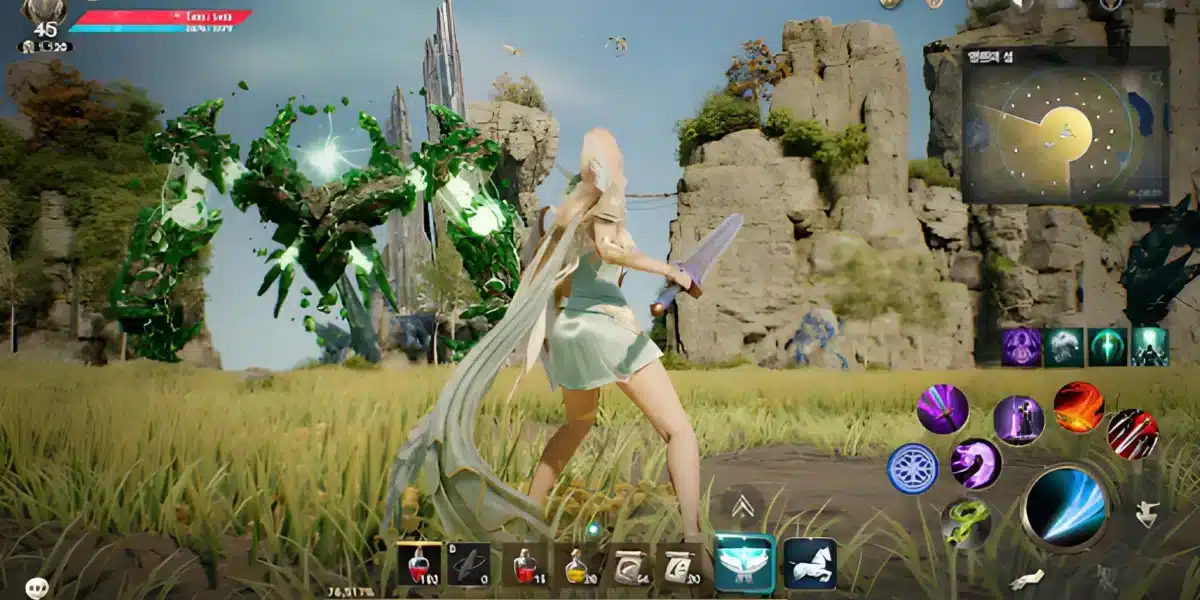
If you’re looking to improve Aion 2 performance, finding the ideal graphics settings is essential. This complete guide will show you how to maximize your FPS, ensuring a smooth and competitive gaming experience.

Why do graphics settings affect your performance in Aion 2?
Aion 2 is known for its cutting-edge graphics and detailed environments. However, this visual beauty comes at a cost: greater demand for system resources. When graphics settings are too high for your hardware, you may experience:
- FPS drops (frames per second) during intense combat
- Freezing in areas with many players
- Input lag that impairs your ability to react quickly
- Excessive heating of your PC or laptop
Optimizing your graphics settings doesn’t necessarily mean sacrificing visual quality. With the right adjustments, you can keep the game beautiful while ensuring stable performance for PvP, raids, and exploration.
Understanding Aion 2 graphics settings
Before adjusting your settings, it’s important to understand what each option does and how it impacts your performance:
Settings that most impact FPS
Shadow Quality: This is one of the heaviest settings. Real-time shadows consume many GPU resources. Reducing from “Ultra” to “Medium” can result in significant FPS gains without major visual loss.
Rendering Distance: Controls how far objects and characters are drawn. The greater the distance, the more work for your graphics card. Reducing this setting drastically improves performance in crowded areas.
Post-Processing Effects: Includes anti-aliasing, bloom, motion blur, and other visual effects. While they make the game more cinematic, they are extremely demanding and can be reduced or turned off.
Texture Quality: Mainly affects VRAM usage. If your graphics card has 4GB or less of VRAM, use textures on “Medium” or “High” instead of “Ultra”.
Effects Quality: Controls particles from abilities, fire, water, and other special effects. In combat with multiple players, this setting can significantly drop your FPS.
Recommended settings by hardware type
For Entry-Level PCs (Integrated graphics or basic GPUs)
If you’re playing with more modest hardware, prioritize performance over visual quality:
Resolution: 1920×1080 (Full HD) or lower if necessary Overall Quality: Low to Medium Shadow Quality: Low or Off Texture Quality: Medium Rendering Distance: 50-70% Post-Processing Effects: Off Anti-Aliasing: Off or FXAA V-Sync: Off FPS Limit: 60 FPS Effects Quality: Low
With these settings, you should be able to maintain 45-60 FPS in normal gameplay situations.
For Mid-Range PCs (GTX 1660, RX 5600 XT or similar)
Mid-range hardware allows for a good balance between visual quality and performance:
Resolution: 1920×1080 (Full HD) Overall Quality: Medium to High Shadow Quality: Medium Texture Quality: High Rendering Distance: 70-85% Post-Processing Effects: Selective (turn off Motion Blur) Anti-Aliasing: TAA or FXAA V-Sync: Off FPS Limit: Unlimited or 120 FPS Effects Quality: Medium to High
These settings should provide 60-90 FPS in most situations, with minimal drops in intense combat.
For High-Performance PCs (RTX 3070, RX 6800 XT or higher)
If you have a powerful PC, you can take full advantage of Aion 2’s graphics:
Resolution: 1920×1080 or 2560×1440 Overall Quality: Ultra Shadow Quality: High to Ultra Texture Quality: Ultra Rendering Distance: 90-100% Post-Processing Effects: High (keep Motion Blur off for competitive play) Anti-Aliasing: TAA or MSAA 2x V-Sync: Off (use G-Sync/FreeSync if available) FPS Limit: Unlimited or 144+ FPS Effects Quality: Ultra
With these settings, you can expect 100+ FPS consistently, even in demanding situations.
Advanced settings for maximum optimization in Aion 2
Beyond the game’s basic settings, there are advanced adjustments that can further improve your performance in Aion 2:
GPU control panel adjustments
For NVIDIA: Open NVIDIA Control Panel, go to “Manage 3D Settings” and adjust:
- Power Management Mode: Prefer Maximum Performance
- Texture Filtering – Quality: High Performance
- V-Sync: Off
- Low Latency Mode: Ultra (if available)
For AMD: Open AMD Radeon Software, go to “Gaming” > “Aion 2” and configure:
- Radeon Anti-Lag: Enabled
- Radeon Boost: Enabled
- Radeon Chill: Disabled for maximum FPS
- Enhanced Sync: Enabled
Windows optimizations
Some Windows settings can significantly impact performance:
- Disable Windows Game Mode (can cause stuttering)
- Set Power Plan to “High Performance”
- Disable Xbox DVR/Game Bar
- Close unnecessary background programs
- Keep your graphics drivers updated
Aion 2-specific optimizations
In the game settings menu, look for these additional options:
- Limit FPS in Background: Enabled (saves resources when minimized)
- Show Other Players: Limit in crowded areas
- Character Quality at Distance: Reduced
- Other Players’ Skill Effects: Simplified or Off
- NPC Density: Medium
How to test and adjust your settings
After applying the recommended settings, it’s important to test and adjust to find the perfect balance:
Monitor your FPS: Use the game’s built-in FPS counter or tools like MSI Afterburner to track your frame rate in different situations.
Test in varied scenarios: Don’t just test in empty areas. Go to crowded cities, participate in PvP combat, and enter dungeons to see how your system performs under pressure.
Adjust gradually: If you’re still experiencing low FPS, reduce one setting at a time, starting with those that have the most impact (Shadows, Effects, Rendering Distance).
Prioritize stability: It’s better to have constant 60 FPS than alternating between 90 and 40. Consistency is more important than high numbers for a competitive experience.
The importance of connection for the overall experience
Even with perfect graphics settings, an unstable connection can ruin your Aion 2 experience. High FPS doesn’t solve problems with network lag, high ping, or packet loss.
If you’ve already optimized your graphics but still face problems with freezing, command delays, or disconnections, the problem may be with your server connection. In these cases, network optimization tools can make a significant difference.
ExitLag works in parallel with your graphics optimizations, ensuring you have both high FPS and low latency for the complete experience. Many players discover that even with medium graphics settings, an optimized connection provides a much superior gaming experience.
To solve specific network lag issues in Aion 2, check out our complete guide on how to reduce lag and enjoy better gaming sessions.
Specific settings for competitive PvP
If you focus on PvP content and want maximum competitive advantage, consider these specific settings:
- Prioritize FPS over quality: Reduce everything necessary to maintain 120+ FPS
- Disable Motion Blur: Makes it easier to track moving enemies
- Reduce Other Players’ Effects: Less visual clutter in group combat
- Use native resolution: Lower resolutions increase FPS but make it harder to see details
- Disable V-Sync: Reduces input lag for faster reactions
- Monitor your ping: Besides FPS, maintain low latency with appropriate tools
Troubleshooting: common problems and solutions
Stuttering even with high FPS: May be caused by CPU limitation. Close background programs and consider upgrading your processor.
FPS drops in specific areas: Reduce Rendering Distance and NPC Density. Crowded areas naturally require more resources.
Screen freezing momentarily: May indicate lack of VRAM. Reduce Texture Quality and close other programs using graphics memory.
Noticeable input lag: Disable V-Sync, enable Low Latency Mode in GPU drivers and check your network connection.
Excessive heating: Limit maximum FPS (for example, 120 FPS), improve your PC’s ventilation and consider cleaning and replacing thermal paste.
Conclusion: finding your perfect balance
Finding the ideal graphics settings for Aion 2 is a personal process that depends on your hardware, visual preferences, and playstyle. The goal is to maximize FPS while keeping the game visually pleasing and, most importantly, playable.
Remember that stable performance is more valuable than maxed-out graphics with inconsistent FPS. Start with this guide’s recommendations and adjust as needed until you find the perfect balance for your system.
And don’t forget: optimizing graphics solves only half the equation. For a complete and competitive experience in Aion 2, you also need an optimized and stable connection. Combine high FPS with low latency and enjoy the game at its maximum potential.
Ready to take your Aion 2 performance to the next level? Download ExitLag and experience the difference of playing with optimized graphics and stable connection simultaneously!
How to use ExitLag in Aion 2
The process is extremely simple:
Step 1 – Access the official ExitLag website and download the application. There’s a free trial period for new users.
Step 2 – Install and open the program. Log in with your account.
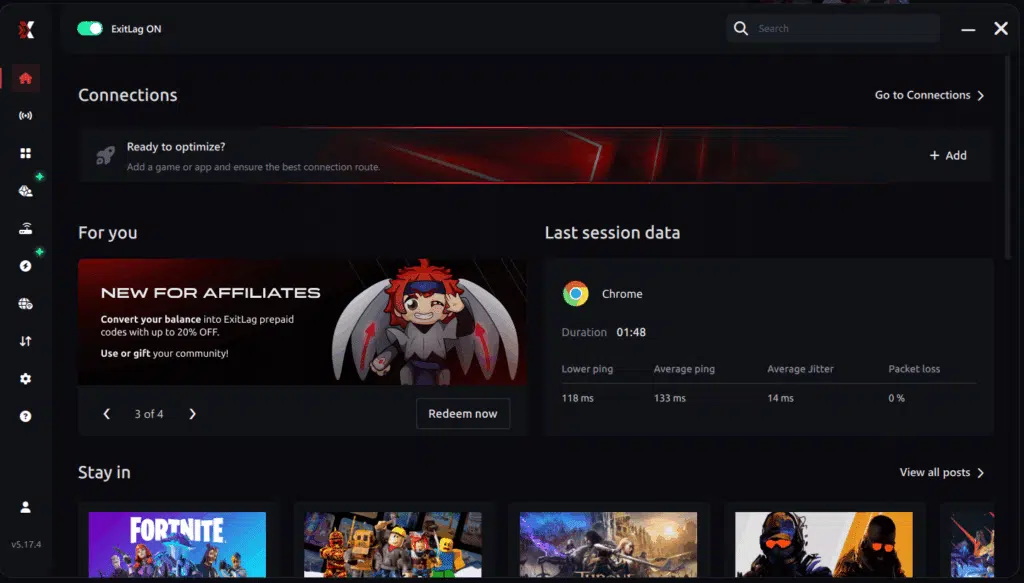
Step 3 – In the search bar, type “Aion 2” and select the game from the list.
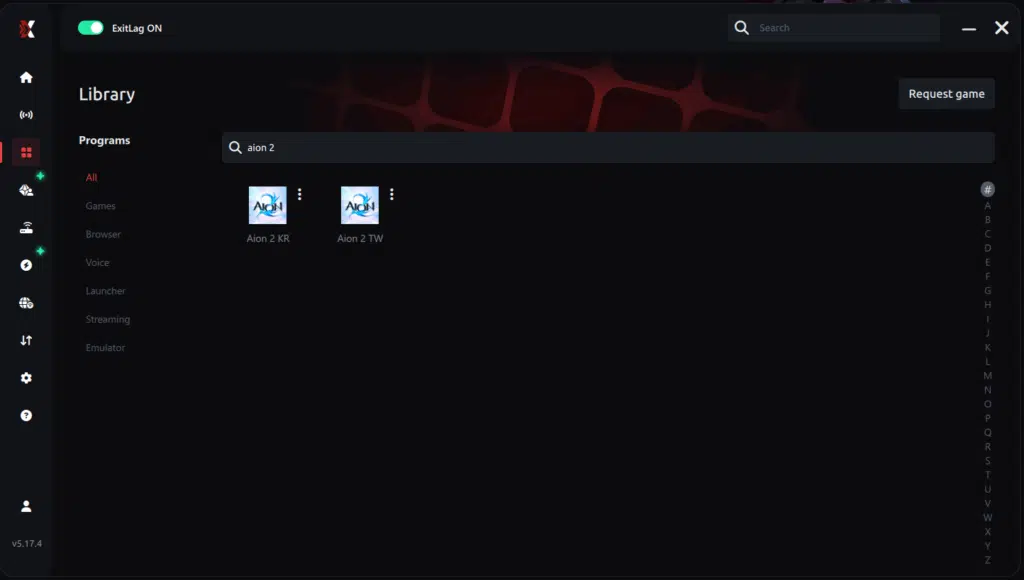
Step 4 – Choose between automated or manual route
Based on the results, you can let ExitLag automatically select the best route or manually choose the server that showed the lowest latency for your connection.
AI-optimized automated route
Based on the results, you can let ExitLag automatically select the best route through AI-optimized . The system analyzes multiple connection paths in real-time and automatically identifies the most efficient route for your connection, ensuring the lowest possible latency without requiring manual choices.
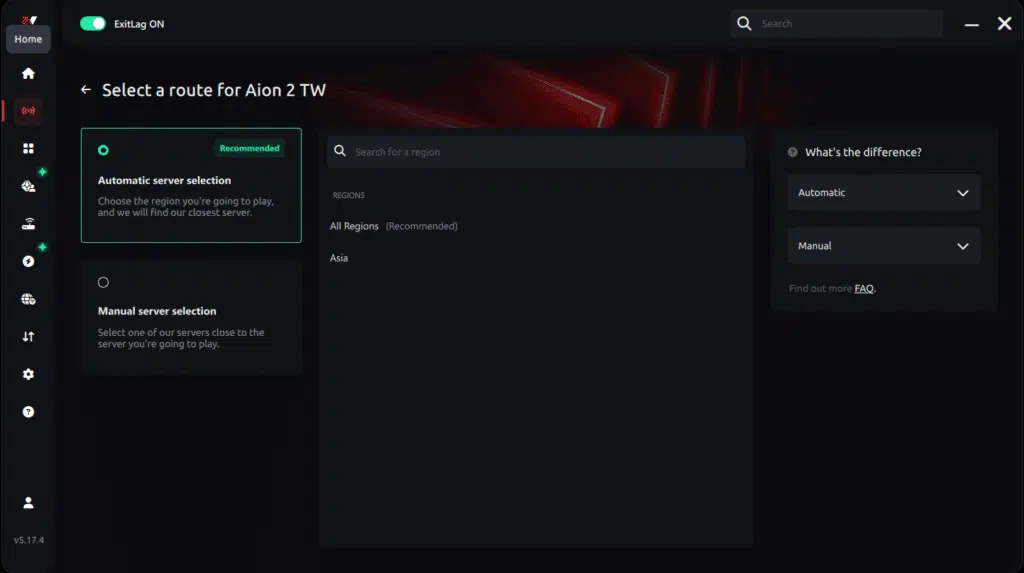
Manual route
If you prefer to have full control over your connection, you can manually choose the server based on the ping test results. Simply select the server that showed the lowest latency or the one that best meets your specific gaming needs, allowing complete customization of your experience.

Step 5 – Click “Apply routes” or the play button. ExitLag will begin optimizing your connection automatically.
AI-optimized automated route:

Manual route:

Step 6 – Wait a few seconds until optimization is complete. You’ll see ping indicators in the interface.
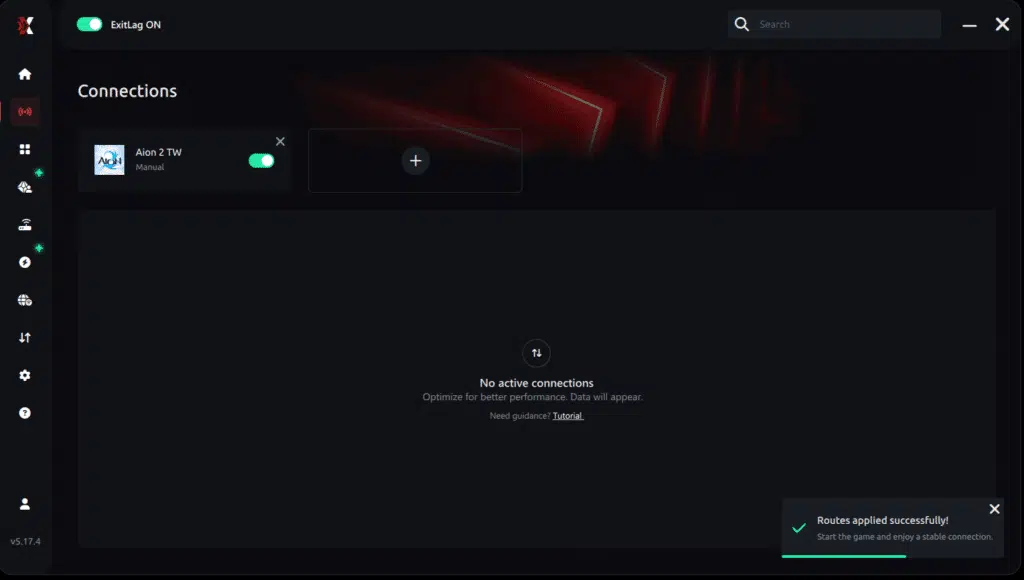
Step 7 – Launch Aion 2 normally. The optimization will already be active.
ExitLag runs in the background while you play, constantly adjusting routes to maintain the best possible performance.
How to use Ping for Games: step-by-step guide
Checking your connection quality before entering a match has never been easier. Here’s how to use Ping for Games in just a few steps:
1. Open the ExitLag software on your PC
Ensure the application is installed and open. The feature is integrated into the platform and available for free to all users.
2. Access the Network Analyzer tool
Locate the Network Analyzer in the software menu. This is where you’ll find Ping for Games along with other connection analysis features.
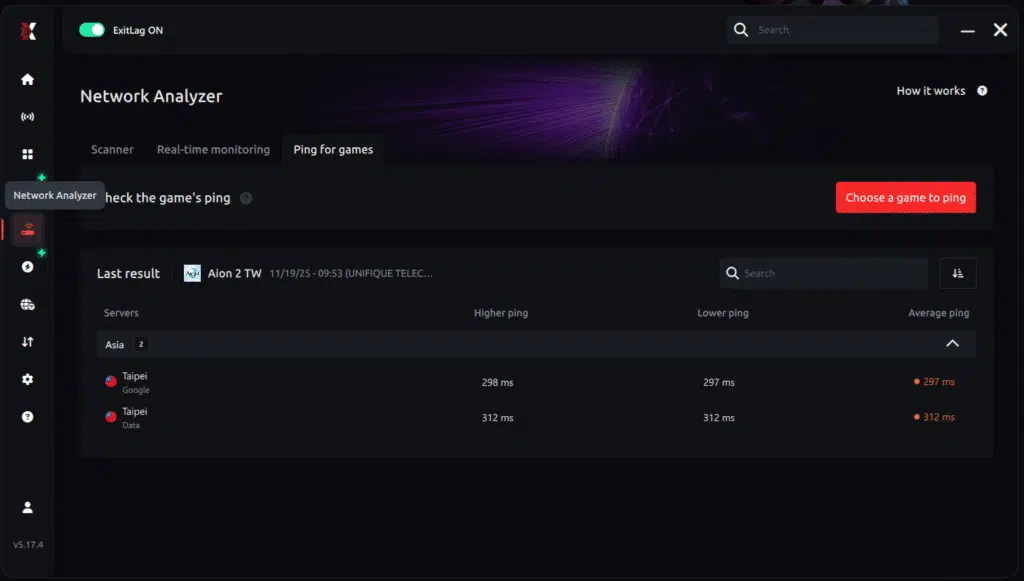
3. Select the game you want to test
Choose from the list the title you plan to play. The tool supports major online multiplayer games, including MOBAs, FPS, Battle Royales, MMORPGs, and more.
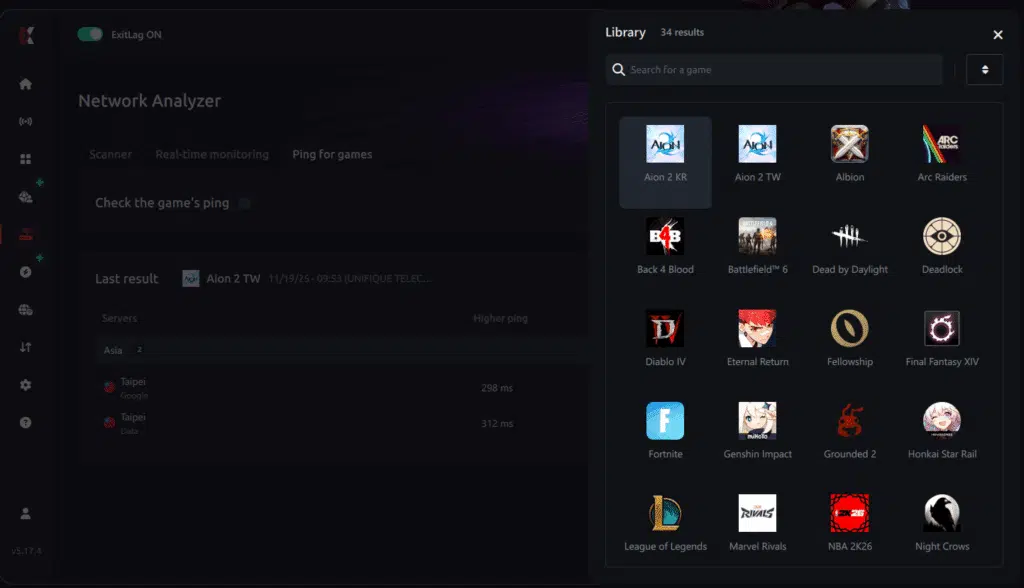
4. Choose the specific server
Now you select directly the server you want to test, instead of just a generic region. This ensures much more accurate results for your choice.
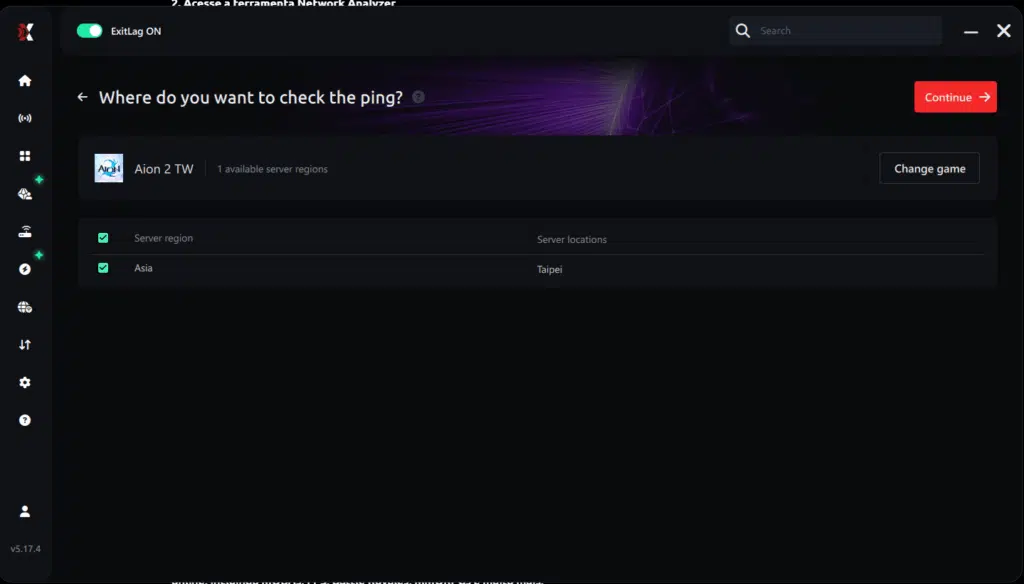
5. Start the ping test
With one click, the measurement is performed in real-time between your device and the chosen server, considering your current connection (cable or Wi-Fi).
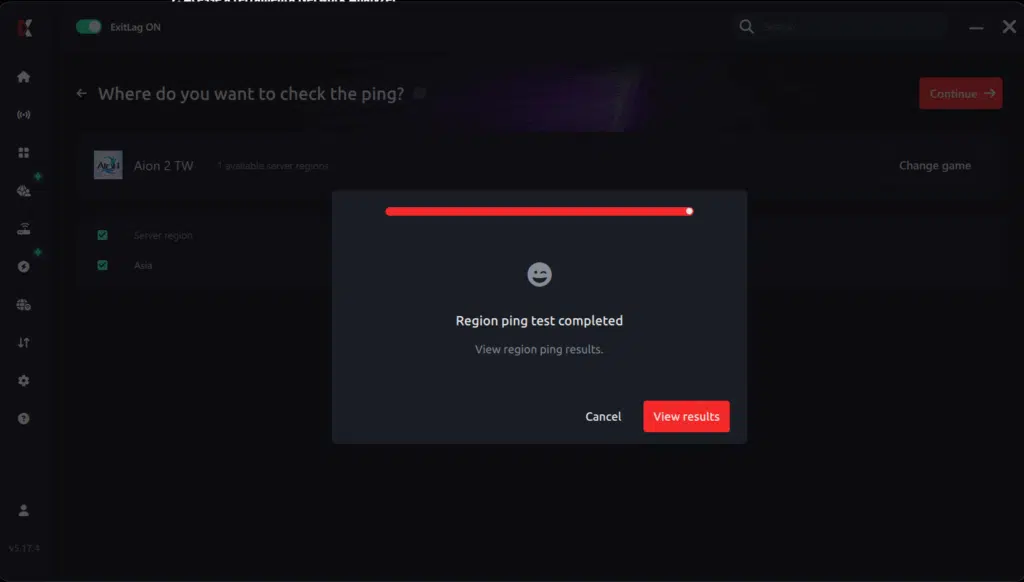
6. Analyze the results
Results appear in milliseconds (ms), automatically sorted from best to worst ping. You can also reorganize the view alphabetically, if you prefer.
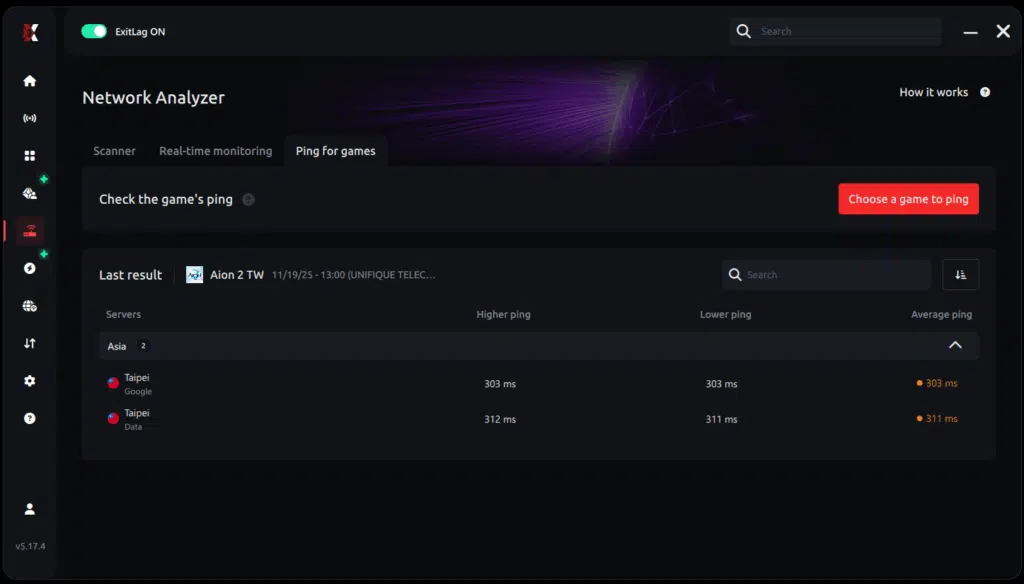
7. Choose the best server and play worry-free
With the information in hand, just select the server with the lowest latency and enter the match knowing your connection is optimized.
Got questions or want to connect with other players? Join the conversation at the ExitLag Forum!