The anvil Minecraft players use is one of the most useful utility blocks in the entire game. It helps you repair tools, combine enchantments, and rename gear without throwing away valuable progress. If you want your best weapons, armor, and tools to last longer, learning how anvils work is essential.
Keeping valuable gear alive matters even more when your world is online and every delay affects combat, movement, or item handling. In those cases, tools that improve connection quality can make routine repairs and upgrades feel far more reliable, especially during multiplayer sessions where Minecraft lag and responsiveness issues become more noticeable. That kind of stability helps when you are trying to protect high-value equipment instead of replacing it.
Anvil Minecraft guides are especially useful for survival players because iron is not cheap in the early game, and poor anvil usage can waste both materials and experience. Once you understand the recipe, durability, repair cost, and enchantment rules, you can save resources and build stronger gear much more efficiently.
In simple terms, an anvil is where item management becomes strategy. Instead of just replacing gear, you can preserve valuable enchantments, merge books, and keep key tools useful for much longer. That makes the anvil Minecraft system important for casual survival worlds, advanced progression, and even PvP preparation.
What is an anvil in Minecraft?
An anvil is a utility block used for three main purposes: repairing items, combining enchantments, and renaming gear. Unlike some other workstations, it gives you control over how items are upgraded and preserved.
This matters because not every item in Minecraft is easy to replace. A good diamond pickaxe, enchanted sword, or custom bow can take a lot of time to build. An anvil helps protect that investment.
You can use anvils to:
- Repair tools and armor
- Merge enchantments from books
- Rename items
- Combine similar gear into stronger gear
- Create more efficient endgame equipment
Many players searching Minecraft anvil recipe, how to make an anvil in Minecraft, or how to craft anvil Minecraft are really trying to solve one core problem: how to keep powerful gear useful for longer.
Why is an anvil different from a grindstone?
A grindstone repairs items too, but it removes enchantments. An anvil, by contrast, can preserve and combine enchantments. That is the biggest difference.
If you care about high-value gear, an anvil is almost always the better long-term tool.
When should you craft one?
You should usually craft an anvil once you start getting:
- Enchanted books
- Valuable iron or diamond gear
- Duplicate tools worth combining
- Enough XP to handle repair costs
That is when the block becomes truly useful rather than optional.
How do you craft an anvil in Minecraft?
This is one of the most searched Minecraft crafting questions for a reason. The recipe is simple, but it requires a lot of iron. If you do not prepare in advance, it can feel more expensive than expected.
To answer how to craft an anvil on Minecraft, how do you make a Minecraft anvil, and how do i make an anvil in Minecraft, you need three iron blocks and four iron ingots.
That means the full cost is:
- 3 iron blocks = 27 iron ingots
- 4 extra iron ingots
- Total = 31 iron ingots
So, if you are asking Minecraft how do you make an anvil, the short answer is: gather 31 iron ingots, turn 27 into three iron blocks, then place them in the correct recipe layout.
anvil Minecraft recipe
Use this exact crafting pattern:
| Top row | Top row | Top row |
| Iron Block | Iron Block | Iron Block |
| Middle row | Middle row | Middle row |
| Empty | Iron Ingot | Empty |
| Bottom row | Bottom row | Bottom row |
| Iron Ingot | Iron Ingot | Iron Ingot |
This is the full Minecraft anvil recipe. If the placement is wrong, the anvil will not appear.
Once you have the anvil ready, it usually becomes part of a broader utility setup rather than a one-off crafting step. Players who are organizing a more functional survival base often pair it with other essentials, including storage, enchanting tools, and resources tied to making books in Minecraft for enchantment planning. That makes the anvil much more useful over time.
Materials needed before crafting
Before you craft, make sure you have:
- 31 iron ingots total
- A crafting table
- Enough space in your inventory
If you want to prepare faster, smelt a large batch of iron first. Then convert 27 ingots into three blocks and keep four aside.
What materials are needed for the anvil recipe?
Before focusing on placement, it helps to understand the total material cost clearly. Many newer players confuse iron blocks with iron ingots, which is one of the most common mistakes.
You need:
- 3 Iron Blocks
- 4 Iron Ingots
Here is the breakdown:
| Material | Quantity | How it is made |
| Iron Block | 3 | 9 iron ingots each |
| Iron Ingot | 4 | Smelted from raw iron |
This means the real total is 31 iron ingots.
That is why players often search how do you create an anvil in Minecraft, how do you make anvil in Minecraft, or how do you make a anvil in Minecraft and then get surprised by the iron cost. The recipe is easy, but not cheap.
Where do you find enough iron?
The fastest way is to mine raw iron underground, then smelt it in a furnace. Caves, cliffs, and mountain areas can all be good sources depending on your version and world generation.
A few fast tips:
- Bring at least one stone or better pickaxe
- Use torches to secure caves
- Smelt iron as soon as possible
- Store extra ingots for future anvils
Is an anvil worth 31 iron ingots?
Usually, yes. It becomes worth it as soon as you start handling enchanted gear regularly. In early survival, that cost can feel high. In midgame and beyond, it becomes one of the most valuable utility investments you can make.
How to craft an anvil in Minecraft on different platforms
The recipe stays the same across versions, but the interface can feel slightly different depending on where you play. That is why players search for how to make an anvil in Minecraft in platform-specific ways.
Still, whether you are on Java, Bedrock, console, or mobile, the recipe itself does not change.
PC and Java Edition steps
For PC and Java Edition:
- Open the crafting table
- Place 3 iron blocks across the top row
- Place 1 iron ingot in the center slot
- Place 3 iron ingots across the bottom row
- Drag the anvil into your inventory
This is the standard process for how to craft an anvil on Minecraft on PC.
Mobile and console steps
For Bedrock mobile and console:
- Open the crafting interface
- Find the anvil if using recipe suggestions
- Confirm you have 3 iron blocks and 4 iron ingots
- Craft the anvil and move it to your inventory
On touch devices, recipe menus can make it feel easier. On console, visual crafting tabs help speed things up.
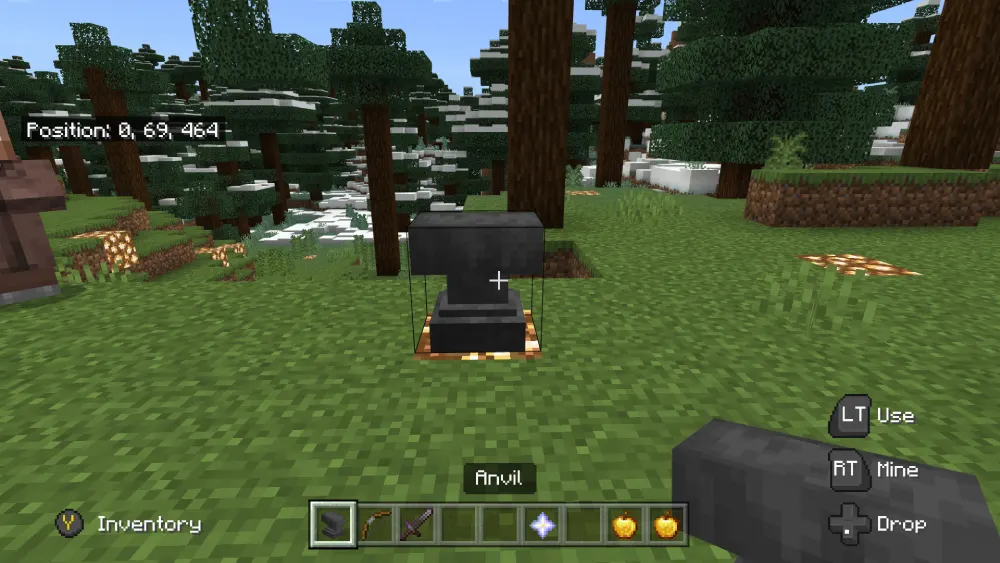
How do you use an anvil in Minecraft?
Once crafted, the next step is using it well. Many players know the recipe but do not fully understand how much value they can get from the block.
An anvil has three core uses:
- Repairing items
- Combining enchantments
- Renaming items
These three functions are what make the anvil Minecraft system so important. It is not just a decorative block. It is one of the main tools for preserving powerful gear.
Repairing tools and armor
To repair an item:
- Open the anvil interface
- Put the damaged item in the first slot
- Put the repair material or duplicate item in the second slot
- Pay the XP cost
- Take the repaired item
For example:
- Iron pickaxe + iron ingot
- Diamond sword + diamond sword
- Bow + bow
This is one of the biggest reasons players ask how to build anvil Minecraft into their base design early. Once the anvil is placed near storage and XP sources, repairs become much more convenient.
Renaming items
To rename gear:
- Put the item in the first slot
- Click the text field
- Type a new name
- Pay the XP cost
- Take the renamed item
This is useful for:
- Organizing tools
- Marking special gear
- Creating themed weapons
- Naming items for multiplayer fun
How do enchantments work with an anvil?
This is where anvils become extremely powerful. Combining books and enchanted gear is one of the smartest ways to create high-level items without relying only on luck from enchanting tables.
A good anvil strategy can save materials, reduce wasted enchantments, and help you build stronger gear with fewer mistakes.
Many midgame players use anvils mostly for enchantment combination rather than basic repairs.
Combining enchantments from books
To combine enchantments:
- Put the target item in the first slot
- Put the enchanted book in the second slot
- Check the result and XP cost
- Confirm the combination
Examples:
- Sword + Sharpness book
- Pickaxe + Efficiency book
- Boots + Feather Falling book
This lets you apply enchantments more precisely than random table rolls.
Combining two enchanted items
You can also merge two similar enchanted items. This may:
- Repair durability
- Stack enchantments
- Increase enchantment levels
- Reduce waste from duplicate drops
Example:
- Sharpness I sword + Sharpness I sword = better sword
- Two damaged enchanted bows = repaired, improved bow
This is one of the main reasons an anvil remains useful even after you have an enchanting table.
Why does an anvil become “Too Expensive”?
This is one of the most frustrating anvil mechanics for newer players. Each time an item is used in an anvil, the internal repair cost increases. Over time, the XP requirement becomes too high, and the game blocks the action with the “Too Expensive” message.
That is why efficient planning matters.
If you use your anvil carelessly, even a strong item can become impossible to modify further in survival.
How to reduce anvil penalty
To avoid high XP costs:
- Combine books before applying them to gear
- Plan enchantment order in advance
- Avoid tiny unnecessary repairs
- Use stronger base items for major upgrades
- Save anvils for valuable equipment
These habits help extend the life of your best items.
What is the smartest enchantment strategy?
Usually, the best route is:
- Collect books first
- Merge books efficiently
- Apply combined books to gear
- Repair only when needed
This reduces long-term XP waste and helps avoid hitting the penalty too early.
Does the anvil break in Minecraft?
Yes. Anvils do not last forever. Every time you use one, there is a chance it becomes more damaged. Over time, it can break completely.
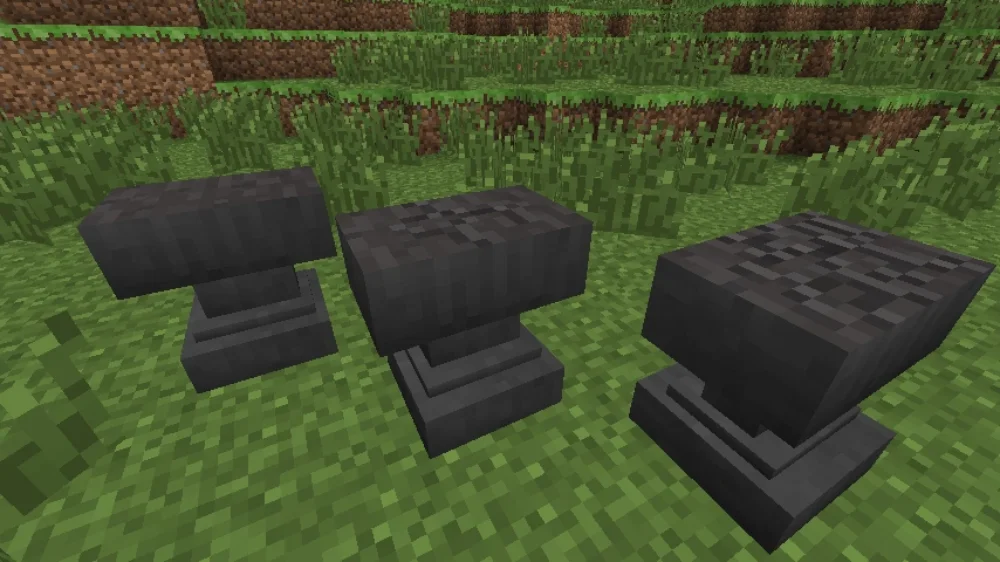
Anvils have three visible states:
- Undamaged
- Chipped
- Damaged
After enough use, the anvil disappears.
That is why experienced players often keep more than one anvil in their base. If you rely on them heavily for enchantment work, having backups saves time.
How long does an anvil last?
There is some variation because damage is chance-based, but anvils generally survive around a couple dozen uses before breaking.
This means they are durable, but not permanent.
Can anvils hurt mobs and players?
Yes. Falling anvils deal damage. Like sand and gravel, they are affected by gravity. If dropped from above, they can injure or kill entities underneath.
This creates fun possibilities for:
- Traps
- Joke contraptions
- Mob farms
- Puzzle builds
Can you slant text on a Minecraft anvil?
This keyword comes up often because players want custom formatting while renaming items. The short answer is that normal vanilla anvil naming does not provide a direct built-in “slant text” toggle like a simple formatting button.
So, for people searching how to slant text on Minecraft anvil, the practical answer is that standard anvil naming is limited. Custom text styling usually depends on platform behavior, formatting support, commands, plugins, or server-specific tools rather than the anvil itself.
What about custom formatting?
If you want highly styled names, you are usually looking at:
- Commands
- Plugins
- Datapacks
- Modded environments
Vanilla survival anvil use is more basic.
For players who want to compare naming limits, repair behavior, or broader survival mechanics, it helps to check the official game ecosystem rather than relying only on scattered community explanations. The official Minecraft site is a reliable starting point for version details, platform access, and core game references that give better context around what vanilla does and does not support. That is especially useful when modded features start getting mixed into basic gameplay advice.
Is there an anvil text mod?
There are mods and custom tools in the Minecraft ecosystem that change item naming, visuals, and interface behavior. Availability depends on mod loader, version, and platform.
What are anvil cap mods in Minecraft?
Some players search for anvil cap mod Minecraft or anvil cap Minecraft because they want to bypass or change the default repair cost cap. In vanilla Minecraft, the anvil system has limits. Mods may alter those limits.
That means these searches are usually about changing the “Too Expensive” restriction rather than crafting the anvil itself.
What does an anvil cap mod do?
Depending on the mod, it may:
- Remove repair cost limits
- Reduce XP cost scaling
- Change anvil durability rules
- Allow more item combinations
This can make endgame item optimization much easier.
Should you use one?
That depends on how you play. For pure vanilla survival, no. For modded quality-of-life play, some players find it useful. It changes balance, though, so it is a preference decision.
Why should you keep an anvil in your base?
Anvils are best when placed where they support your normal gameplay loop. Instead of hiding one in a random corner, build your base around useful workstations.
A smart utility area often includes:
- Chests
- Crafting table
- Furnace or blast furnace
- Enchanting setup
- Anvil
- XP source nearby
This makes upgrading gear much faster and smoother.
Best place to put an anvil
Good placement options include:
- Near storage
- Next to enchanting tables
- Close to XP farms
- Near armor and weapon chests
That reduces walking and makes item upgrades more efficient.
How to build an anvil area
If you are asking how to build anvil Minecraft into your survival base, keep it practical. You do not need anything elaborate. A compact workshop room is enough.
Useful design ideas:
- Stone and iron workshop theme
- Dedicated enchantment corner
- Tool wall with labeled chests
- Backup anvils in storage
A clean workshop also benefits from practical layout choices that make the room easier to access and organize. Entry points, storage flow, and how you separate crafting areas can all improve the space, especially if you are also thinking about smart ways to use Minecraft doors in a base design. Small structural choices make the anvil area feel much more intentional.
Why ExitLag matters for Minecraft
Minecraft is not only about crafting and mining. Many players spend a lot of time in multiplayer worlds, shared servers, PvP lobbies, and co-op survival sessions. In those situations, connection quality affects how smooth the experience feels.
That is where ExitLag becomes relevant. If your game stutters during multiplayer play, menus feel delayed, or world interaction becomes inconsistent, connection optimization can help reduce those issues.
For Minecraft players, this matters most during:
- Multiplayer survival
- Large servers
- PvP matches
- Shared creative worlds
- Modded server sessions
How can ExitLag help?
ExitLag can help improve:
- Connection stability
- Ping consistency
- Multiplayer responsiveness
- General smoothness during online sessions
That means fewer interruptions while crafting, moving items, fighting, or traveling through busy multiplayer environments.
When is ExitLag most useful?
It is especially useful when:
- You play on distant servers
- Your routing feels inconsistent
- You notice spikes in lag
- PvP timing matters
- Multiplayer interactions feel delayed
FAQ
To craft an anvil, place 3 iron blocks on the top row, 1 iron ingot in the center slot, and 3 iron ingots on the bottom row. The total cost is 31 iron ingots.
If you are searching how to make an anvil in Minecraft, the answer is simple: gather 31 iron ingots, convert 27 into 3 iron blocks, and use the standard crafting table recipe.
The Minecraft anvil recipe is 3 iron blocks across the top, 1 iron ingot in the middle, and 3 iron ingots across the bottom.
The recipe is the same as Java. Open the crafting interface, make sure you have the materials, and craft the anvil through the recipe menu or manually.
Yes. That is one of the main reasons to use one. Anvils let you repair and combine enchanted items without automatically stripping enchantments the way a grindstone does.
Anvil cap Minecraft usually refers to the repair cost limit in vanilla Minecraft. Some players look for mods to reduce or remove it.
Vanilla anvils do not include a normal built-in slanted text feature. Custom formatting usually depends on commands, mods, plugins, or specific server tools.
Final thoughts on anvil Minecraft
The anvil Minecraft system is one of the most important mechanics for long-term gear progression. It lets you repair valuable equipment, merge enchantments, rename items, and preserve your best tools instead of throwing them away. Once you understand the recipe and repair rules, anvils stop feeling expensive and start feeling essential.
Whether you came here searching how to craft an anvil on Minecraft, how do you make a Minecraft anvil, or how to craft anvil Minecraft, the key takeaway is the same: one anvil costs 31 iron ingots, but the value it gives back can be much greater over time. Used well, it saves resources, protects enchantments, and makes your world progression more efficient.
And if you play Minecraft online, especially on multiplayer servers where lag can interrupt crafting, movement, or combat, ExitLag is worth trying. anvil Minecraft progression feels much better when your connection is stable, so use ExitLag to keep your gameplay smoother and more responsive.
Players who want more ideas beyond written guides can also follow official updates and videos straight from the source. The official Minecraft YouTube channel regularly highlights gameplay features, building inspiration, and broader game content that can help you think differently about survival progression. That makes it a useful follow-up once you have the anvil basics covered.
Got questions or want to connect with other players? Join the conversation at the ExitLag Forum!