
In the haunting world of Hallownest, survival hinges on precision, timing, and resilience. One of the most vital resources to extend your life in Hollow Knight is the mask shards. These ancient fragments are scattered across the kingdom, offering not only practical benefits but also deep ties to the game’s lore.
If you’re on a mission to collect all mask shards in Hollow Knight, this guide will walk you through every location, the gameplay mechanics they influence, and how they reflect the Knight’s emotional and physical transformation.

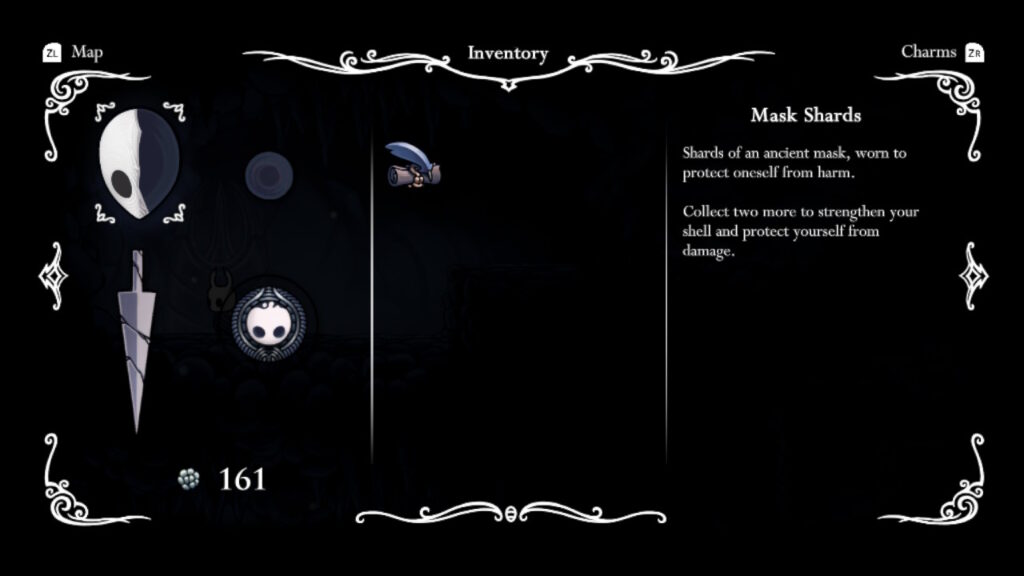
What Are Mask Shards in Hollow Knight?
Mask shards are collectible items that, when combined in groups of four, form a new mask, increasing your total health by one. You’ll need 16 mask shards total to achieve full health capacity, which results in 9 masks (starting with 5).
These upgrades are crucial in preparing for late-game bosses like Nightmare King Grimm or the Radiance, where every hit counts. But their function goes beyond mechanics, they symbolize the Knight’s resilience and evolving connection to Hallownest.
Complete List: All 16 Hollow Knight Mask Shard Locations
Below is the full list of confirmed mask shard locations, organized with updated requirements and corrections:
1–4. Purchased from Sly (Dirtmouth)
- Requirements: 150 / 500 / 800 / 1,500 Geo (last two require the Shopkeeper’s Key)
- Location: Dirtmouth
- Type: Shop purchase
5. Brooding Mawlek (Forgotten Crossroads)
- Requirement: Defeat Brooding Mawlek
- Type: Combat reward
6. Bretta’s House (Dirtmouth)
- Requirement: Rescue Bretta in the Fungal Wastes, then return to Dirtmouth
- Type: NPC reward
7. Forgotten Crossroads (Under the False Knight Arena)
- Requirement: Mantis Claw
- Type: Platforming
8. Queen’s Station (Right Side)
- Requirement: Mantis Claw
- Type: Exploration
9. Stone Sanctuary (Greenpath)
- Requirement: Lumafly Lantern
- Type: Hidden platforming
10. Royal Waterways (Northwest, underwater path)
- Requirement: Swim beneath the main corridor
- Type: Exploration
11. Deepnest (Near Mantis Lords, via Fungal Core)
- Requirement: Monarch Wings
- Type: Exploration
12. The Hive (Behind destructible wall)
- Requirement: Defeat Hive Guardian and access hidden wall
- Type: Combat and secret area
13. Crystal Guardian (Second Encounter)
- Requirement: Monarch Wings
- Type: Combat
14. Grubfather (Forgotten Crossroads)
- Requirement: Rescue 5 Grubs
- Type: NPC reward
15. Seer – Dream Nail Quest (Resting Grounds)
- Requirement: Collect 1,500 Essence
- Type: Dream reward
16. Grey Mourner (Delicate Flower Quest)
- Requirement: Complete the delivery without taking damage
- Type: Precision challenge

Hollow Knight Mask Shard Locations Summary
| # | Location | Requirement | Type |
| 1–4 | Sly’s Shop (Dirtmouth) | 150–1,500 Geo + Shopkeeper’s Key | Shop |
| 5 | Brooding Mawlek | Defeat mini-boss | Combat |
| 6 | Bretta’s House | Rescue Bretta | NPC Reward |
| 7 | Forgotten Crossroads (under False Knight) | Mantis Claw | Platforming |
| 8 | Queen’s Station | Mantis Claw | Exploration |
| 9 | Stone Sanctuary | Lumafly Lantern | Platforming |
| 10 | Royal Waterways (northwest) | Swim path | Exploration |
| 11 | Deepnest (Fungal Core route) | Monarch Wings | Exploration |
| 12 | The Hive | Breakable wall + Hive Guardian | Secret/Combat |
| 13 | Crystal Guardian (2nd fight) | Monarch Wings | Combat |
| 14 | Grubfather | Rescue 5 Grubs | NPC Reward |
| 15 | Seer (Resting Grounds) | 1,500 Essence | Dream Reward |
| 16 | Grey Mourner | Deliver flower with no damage | Precision Challenge |
The Lore Behind the Mask Shards
While many players see the mask shard Hollow Knight mechanic as a simple health upgrade, these shards hold deeper narrative symbolism. Each completed mask reflects the Knight’s ongoing reconstruction, both physically and emotionally, representing their journey to reclaim identity and purpose.
Fragments are also a nod to the Pale King’s legacy, symbolizing the fractured nature of vessels and the sacrifice underlying Hallownest’s fall. While interpretations vary, the symbolism of resilience and self-repair is a recurring theme in the game’s visual and narrative structure.
How ExitLag Helps You Survive Hollow Knight’s Toughest Areas
Even in a primarily offline game like Hollow Knight, performance issues such as lag, input delay, and system latency, especially when playing via online platforms like Steam or GOG, can ruin precision gameplay.
ExitLag helps by:
- Reducing network instability during launch and updates
- Ensuring smooth frame pacing during intense scenes
- Enhancing input responsiveness in high-precision platforming areas
Whether you’re attempting 112% completion, navigating Godhome Pantheons, or exploring the White Palace, a consistent connection improves stability and keeps you focused on gameplay.
Optimize Your Route for All Hollow Knight Mask Shards
Collecting all mask shards requires not just skill, but planning. Here’s how to streamline your journey:
1. Early Game (Mask Count: 5 ➝ 6 Masks)
- Unlock Sly in Forgotten Crossroads and buy the first two shards (150 + 500 Geo).
- Rescue Bretta (Fungal Wastes) and grab the shard under the False Knight.
- Explore Queen’s Station and pick up the shard in the right-hand path.
- Optional: Visit Grubfather after rescuing 5 Grubs for an early bonus shard.
2. Mid Game (6 ➝ 7 Masks)
- Buy the next Sly shard (800 Geo) after obtaining the Shopkeeper’s Key.
- Reach Stone Sanctuary with the Lumafly Lantern and grab the hidden shard.
- Find the shard in Royal Waterways (northwest corner).
- Unlock Monarch Wings to access Deepnest’s shard.
3. Late Game (7 ➝ 9 Masks)
- After beating the Watcher Knights, revisit Crystal Peak to face the Crystal Guardian (2nd encounter).
- Use Crystal Heart and Monarch Wings to reach the Hive and uncover the hidden wall.
- Beat all 3 Colosseum trials for the arena shard.
- Finish the Seer’s Dream Nail arc (1,500 essence) for another.
- Complete the Grey Mourner’s Delicate Flower quest. Do not use fast travel or benches during this delivery, or you will void the quest progress.
- Final shard: buy Sly’s last shard (1,500 Geo).
Tip:
Use Stag Stations and tram routes before the Delicate Flower quest. During the delivery, you must walk the entire route, no Dream Gates, benches, or Stag usage.
Missable or Time-Sensitive Mask Shards
While no shard is truly “missable,” several are tied to choices or difficult encounters:
Grey Mourner’s Delicate Flower Quest
- If the flower is damaged, the quest resets, but this can be frustrating without careful routing.
- Important: You must not use any fast travel (Stag Station, Dream Gate, benches) during the mission. Doing so cancels the flower delivery.
Grimm Troupe Questline
- Correction: Banishing the Grimm Troupe does not reward a mask shard. Instead, it provides the Carefree Melody charm, which replaces Grimmchild.
- Optional Note: Players must choose between keeping Grimmchild (offensive, summons a companion) or accepting Carefree Melody (defensive, grants a chance to negate damage). This decision has no impact on mask shards.
Colosseum of Fools (Tier 3)
- Some players skip this out of difficulty. Consider this shard the game’s challenge badge.
Charms That Boost the Power of Your Mask Count
More masks = more survivability. But smart charm use elevates you even further.
Recommended Charms:
1. Quick Focus
- Heals you faster. More masks mean better returns on Soul.
2. Grubsong
- Generates Soul when taking damage, pairs perfectly when you have more health to spare.
3. Stalwart Shell
- Reduces knockback, helping you recover better when you’ve got a buffer.
4. Joni’s Blessing
- Replaces your masks with Lifeblood, great with full upgrades if you want a burst HP approach.
5. Shape of Unn
- Especially useful during the Delicate Flower quest or precise boss fights.
6. Baldur Shell
- Pairs well with full masks for safe healing during chaos.
Situational Pairings:
- Deep Focus + Quick Focus = Safe regen.
- Hiveblood = Useful for specific zones like White Palace.
- Dreamshield = Defense while repositioning or healing.
Late-Game Shard Navigation: Precision Required
Some mask shards aren’t just hidden, they demand tight platforming or enemy evasion:
Hive Shard
- Use Hiveblood + Hive Knight’s arena knowledge to practice dodge patterns.
Crystal Guardian (2nd Fight)
- Equip Fragile Strength and Dashmaster for quicker burst kills.
Royal Waterways
- Stay underwater longer with Isma’s Tear, and use Lumafly Lantern to guide your route.
Deepnest
- Bring Wayward Compass and Sharp Shadow to shorten travel time and avoid repeat damage.
ExitLag and Late-Game Performance
ExitLag isn’t just for multiplayer games. In platformers like Hollow Knight, precision means everything. Frame pacing issues or launch-time lag from Steam or GOG overlays can introduce stutters, even offline.
Use ExitLag to:
- Avoid frame drops during Dream Bosses or White Palace platforming.
- Stabilize your system’s background latency to avoid input delay.
- Boost responsiveness during Colosseum fights or precision quests like the Delicate Flower delivery.
The Emotional Payoff of Full Mask Completion
It’s more than just health.
Reaching all 9 masks means confronting Hallownest’s deepest secrets, its lost children, its decaying royalty, and its forsaken dreams.
Whether you banished the troupe or walked through the White Palace unscathed, each shard you earn is proof of endurance and growth. They remind you that healing takes effort, that protection is earned, and that even a Vessel built for silence can persist.
You started as a fractured husk. Now, you’re whole.
Final Note: May your shell never break. And if it does, may you find all your pieces again.
All game images used in this blog belong to Team Cherry. They are used for informational/educational purposes only and do not imply endorsement or affiliation with the rights holders.
Got questions or want to connect with other players? Join the conversation at the ExitLag Forum!


