A Minecraft iron farm is one of the most valuable systems you can build in survival mode. Iron is used in countless recipes, and manually mining it quickly becomes inefficient as your world progresses.
If you want a steady, automatic supply of iron, learning how a Minecraft iron farm works is essential. With the right setup, you can generate iron continuously without ever picking up a pickaxe again.
So, what is a Minecraft iron farm? It’s a structure that uses villagers and game mechanics to spawn iron golems, which are then automatically eliminated to drop iron ingots.
Minecraft Iron Farm: How It Works and Why You Need One
Understanding the mechanics behind the farm is the first step to building an efficient system.
How a Minecraft iron golem farm works
An Minecraft iron golem farm relies on villagers detecting threats. When villagers become scared (usually by a zombie), they spawn iron golems to defend themselves.
Your farm takes advantage of this behavior by:
- Keeping villagers in a controlled environment;
- Placing a zombie where villagers can see it;
- Forcing golem spawns in a specific area;
- Automatically eliminating the golems.
This creates a continuous cycle of iron production.
Why iron farms are essential
Here’s why players prioritize building one:
- Unlimited iron supply;
- No need for mining;
- Consistent automation;
- Faster progression.
If you want efficiency, building the best iron farm Minecraft early is a huge advantage.
How to Make an Iron Farm Minecraft Step by Step
If you’ve never built one before, don’t worry, learning how to make an iron farm Minecraft is much easier than it seems once you understand the logic behind it.
The goal here is not just to build something that works, but to create a system that runs consistently without you needing to fix it all the time.
Let’s walk through it together.
Basic structure for beginners
If you’re starting from scratch, the best approach is to follow a simple and reliable iron farm tutorial Minecraft setup.
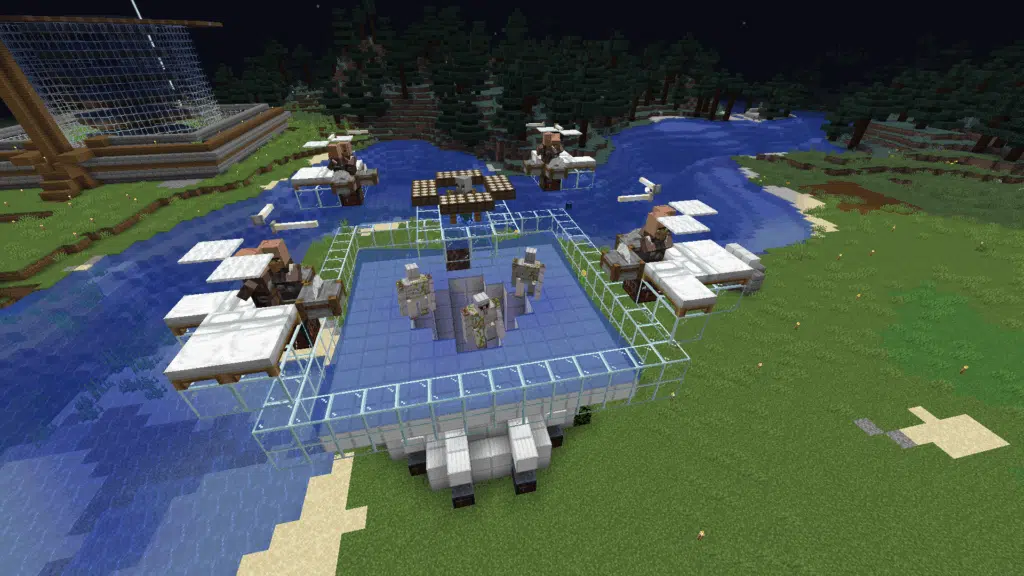
Here’s the basic structure you should build:
- Build a platform at least 20 blocks above ground: This helps isolate your farm and prevents interference from other mobs or villages nearby.
- Place 3–5 villagers with beds and workstations: These villagers are the core of your Minecraft iron golem farm, so make sure they are safe and properly linked to their beds.
- Add a zombie in a controlled and safe position: The zombie is what triggers the villagers’ panic, which is essential for spawning iron golems. Make sure it’s visible but cannot harm the villagers.
- Create a spawning platform for golems: This is where iron golems will appear. It must be flat, open, and designed to control where golems spawn.
- Use water streams to move golems: Water channels will guide the golems toward your kill area automatically.
- Lead them into a lava blade or kill chamber: This is where the golems are eliminated, dropping iron ingots for you to collect.
Now, let me ask you something: If you build exactly this, will it work? Yes. Will it be efficient? Not necessarily, and that’s where the next part comes in.
Key building tips that make a real difference
This is where most players either succeed… or struggle.
Even if your farm “works”, small mistakes can drastically reduce your iron farm rates Minecraft without you realizing it.
Here’s what you need to pay attention to:
- Keep villagers alive and protected: Sounds obvious, but even minor damage or interruptions can break the spawning cycle.
- Ensure villagers can sleep and work properly: Villagers need to maintain their routine. If they can’t sleep or access their workstations, your Minecraft iron farm may stop producing.
- Prevent other spawn locations nearby: If golems spawn outside your farm, your efficiency drops immediately. Use slabs, carpets, or lighting to control this.
- Place slabs and blocks to control spawning: A clean and controlled spawning platform is what separates a basic farm from a high-performance Minecraft iron farm design.
Think of it like this: Your farm is not just a structure, it’s a system. And systems depend on precision.
Best Iron Farm Minecraft Designs
Now that you understand the basics, the next step is choosing the right design.
And this is where things get interesting, because not all farms are built for the same purpose.
Popular iron farm types you should know
As you explore different Minecraft iron farm design options, you’ll notice that each type serves a specific goal.
Here are the most common ones:
- Compact farms (easy to build):
Perfect if you’re just starting out. They require fewer resources and are great for learning how the system works. - Multi-layer farms (higher output):
These farms stack multiple spawning platforms, increasing production significantly. Ideal if you want better iron farm rates Minecraft. - Villager-based towers:
Vertical designs that optimize space and allow multiple villager groups to operate simultaneously. - Advanced modular farms:
These are used in the most efficient iron farm Minecraft setups. Instead of one big structure, you build multiple modules working together.
Each design comes with trade-offs between complexity, cost, and efficiency.
Which design should you choose for your world?
Now here’s the real question: what’s the best option for you?
If you’re just learning how to make an iron farm Minecraft, don’t overcomplicate it. Start with a compact farm and make sure you fully understand how it works.
But if you’re thinking long-term, especially if you need large amounts of iron, you should aim for scalability.
That’s where multi-layer and modular designs shine.
Let me put it simply:
- Want something quick and functional? → Go compact;
- Want consistent growth? → Go multi-layer;
- Want maximum efficiency? → Go modular.
The difference between a basic setup and the best iron farm Minecraft isn’t just size, it’s how well the system is optimized and how easily it can scale.
And once you reach that level, your iron production becomes practically unlimited.
Iron Farm Rates Minecraft: What to Expect
Understanding production rates helps you set expectations.
Average iron production rates
Different designs produce different results:
| Farm Type | Iron per Hour | Complexity |
| Basic Farm | 30–50 | Easy |
| Improved Farm | 80–120 | Medium |
| Advanced Farm | 150–300+ | Hard |
How to read these results
If you’re just starting, a basic farm already replaces manual mining.
As you upgrade your Minecraft iron farm design, production increases significantly. Advanced farms can generate hundreds of iron ingots per hour, making them ideal for large builds and automation systems.
This is why understanding iron farm rates Minecraft is so important, it helps you decide how far to scale your setup.
Tips to Maximize Your Iron Farm Efficiency
Building a working Minecraft iron farm is already a big step, but if you stop there, you’re leaving a lot of iron on the table.
The truth is, most farms can produce much more with a few smart adjustments. Whether you’re following an iron farm tutorial Minecraft or creating your own Minecraft iron farm design, optimization is what separates an average farm from a highly efficient system.
Let’s break down how you can improve your results in a practical way.
Optimization strategies that actually increase iron rates
If your goal is to boost iron farm rates Minecraft, you need to focus on consistency. Iron golem spawning depends heavily on villager behavior and proper setup conditions.
Here are the most important upgrades you can make:
- Keep villagers constantly active: Villagers need to sleep and work regularly to maintain golem spawning cycles. If they stop interacting with beds or workstations, your farm slows down immediately.
- Maintain proper zombie visibility: The zombie must be visible to villagers at the right intervals. If visibility is blocked, even partially, your Minecraft iron golem farm will stop producing efficiently.
- Prevent spawning outside the farm: Golems can spawn anywhere within range if conditions are met. Use slabs, carpets, or water to control spawn areas and force them into your kill chamber.
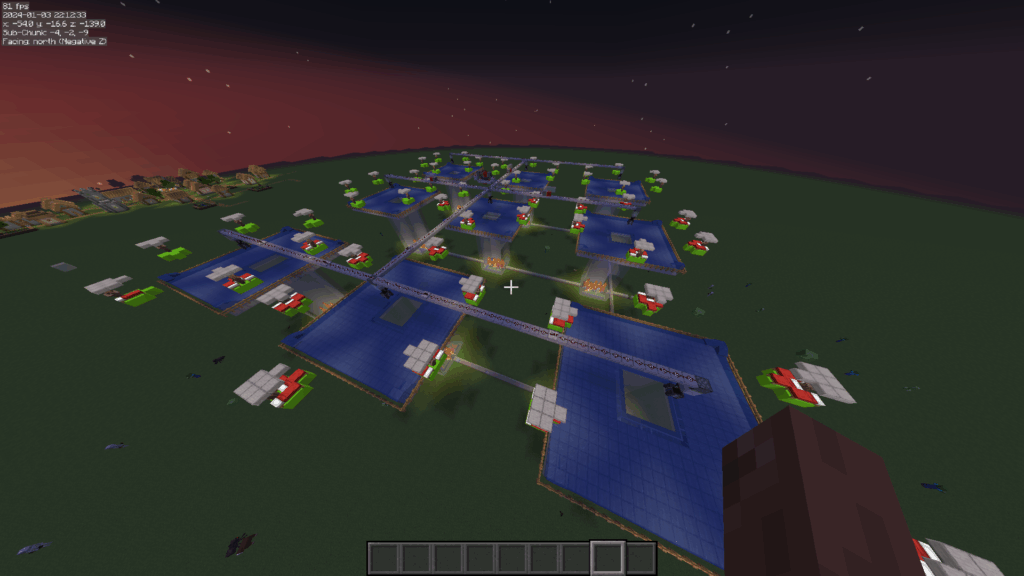
- Expand with multiple modules: One of the secrets behind the most efficient iron farm Minecraft setups is duplication. Instead of making one farm bigger, experienced players build multiple modules working together.
When these elements are aligned, your farm becomes significantly more consistent, and that’s exactly what increases production over time.
Common mistakes that reduce your farm efficiency
Now, let’s talk about what might be holding your farm back.
Even if you followed a good how to make an iron farm Minecraft guide, small mistakes can completely break your system without you noticing.
Here are the most common problems:
- Villagers losing line of sight: If villagers can’t clearly see the zombie, they won’t panic, and no panic means no golem spawning.
- Incorrect bed placement: Beds must be properly linked to villagers. If not, the spawning mechanics won’t trigger correctly.
- Poor spawn platform design: If your spawning area isn’t optimized, golems may spawn outside the intended zone or not spawn at all.
- Too much distance between components: If villagers, zombie, and spawning platforms are too far apart, the system becomes inconsistent and reduces your overall iron farm rates Minecraft.
Here’s the key insight: iron farms are extremely sensitive to small details. Sometimes your farm isn’t “broken”, it’s just inefficient.
What separates a good farm from the best iron farm Minecraft
If you’re aiming for the best iron farm Minecraft, focus on reliability instead of complexity.
Ask yourself:
- Are villagers always reacting to the zombie?
- Is every golem spawning exactly where I want?
- Is my system running consistently over time?
If the answer is yes, you’re on the right track. In the end, optimizing a Minecraft iron farm design isn’t about making it bigger, it’s about making it smarter.
Performance Tips for Better Farm Results
Performance affects automation more than you think.
Why performance matters
Iron farms depend on game ticks and consistent mechanics. If your game lags, spawn rates can drop.
How ExitLag helps
ExitLag improves your connection by:
- Reducing lag spikes;
- Stabilizing ping;
- Improving responsiveness;
- Ensuring smoother gameplay.
This is especially useful in multiplayer servers where performance directly impacts farm efficiency.
FAQ
At least 3 villagers are required, but more can increase efficiency.
Yes, as long as you stay within the simulation distance.
Multi-layer farms are the most efficient for high production.
Common issues include villagers not sleeping, poor positioning, or spawn interference.
Depending on the design, between 30 and 300+ iron ingots per hour.
Build Smarter with ExitLag and Maximize Your Farm Efficiency
A well-built Minecraft iron farm gives you unlimited resources and saves countless hours of mining.
But for the best results, especially in multiplayer, performance and connection stability are key.
With ExitLag, you can enjoy smoother gameplay, better responsiveness, and more consistent farm performance.
Try ExitLag now and take your Minecraft automation to the next level!
Got questions or want to connect with other players? Join the conversation at the ExitLag Forum!