Minecraft potions and recipes can completely change how you prepare for an adventure. The right potion can help you survive lava, explore underwater structures, see in darkness, recover health, move faster, or gain an advantage during difficult combat.
Learning minecraft potions and recipes is also easier once you understand the basic brewing flow. Most useful potions follow a predictable progression, so you do not need to memorize every combination independently. Instead, learn the base potion, effect ingredients, and modifiers that transform your brew.
So, what do you need to start with minecraft potions and recipes? A basic setup requires a Brewing Stand, Blaze Powder for fuel, Water Bottles, and the ingredients associated with the effects you want. For many useful potions, Nether Wart is the key ingredient that turns a Water Bottle into an Awkward Potion.
Once the fundamentals make sense, brewing becomes a preparation system rather than a confusing collection of ingredients. You can organize materials before exploring the Nether, entering dangerous caves, fighting mobs, or joining multiplayer combat.
This guide explains the complete process, from your first Water Bottle to specialized brews such as Invisibility, Strength, Fire Resistance, and Splash Potions.
Minecraft Potions and Recipes: How Brewing Works
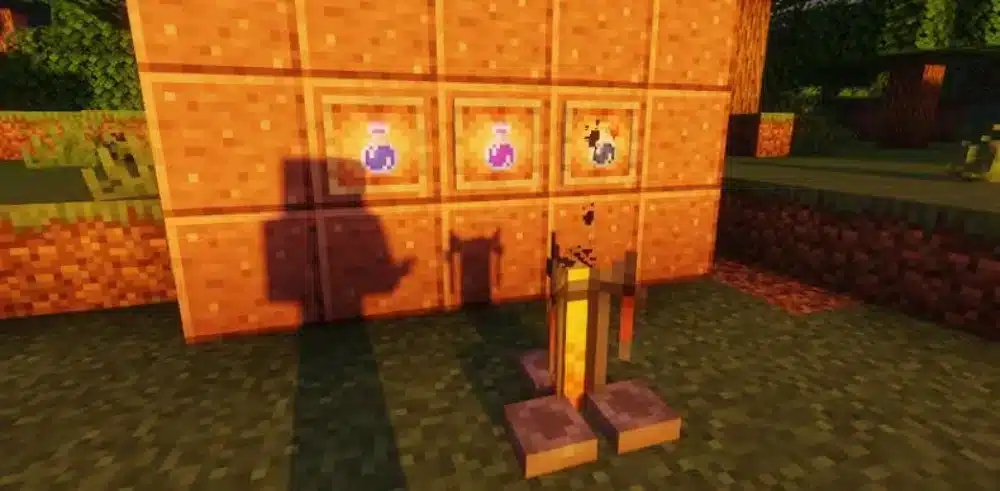
Before memorizing individual minecraft potion recipes, learn how the Brewing Stand works.
Minecraft's brewing system combines bottles, fuel, and ingredients. The ingredient placed at the top is applied to bottles in the lower brewing slots, allowing several potions to be processed during the same brewing operation.
How to make and use a Brewing Stand
A Brewing Stand requires one Blaze Rod and three Cobblestone blocks to craft.
Blaze Rods come from Blazes, which means reaching the Nether is normally an important milestone before serious potion production begins.
You will also need Blaze Powder to fuel the Brewing Stand.
A basic brewing setup should contain:
- Brewing Stand
- Blaze Powder
- Glass Bottles
- Water source
- Nether Wart
- Effect ingredients
- Redstone Dust
- Glowstone Dust
- Gunpowder
- Fermented Spider Eyes
Place Blaze Powder in the fuel slot and Water Bottles in the bottle slots. Then place your brewing ingredient in the ingredient slot.
Because the Brewing Stand has three bottle positions, organizing several bottles before starting can make potion production considerably more efficient.
How to brew an Awkward Potion
The Awkward Potion is one of the most important bases in potion recipes minecraft players regularly use.
The recipe is straightforward:
Water Bottle + Nether Wart → Awkward Potion
An Awkward Potion does not provide a useful status effect by itself. Instead, it acts as the foundation for many important brews.
From there, adding a specific ingredient determines what the potion becomes.
For example:
- Awkward Potion + Sugar → Potion of Swiftness
- Awkward Potion + Magma Cream → Potion of Fire Resistance
- Awkward Potion + Golden Carrot → Potion of Night Vision
- Awkward Potion + Blaze Powder → Potion of Strength
- Awkward Potion + Ghast Tear → Potion of Regeneration
This branching structure is the key to understanding brewing.
Rather than remembering every potion as a completely separate recipe, think of Nether Wart as opening the path toward many useful effects.
Minecraft Potion Recipes and Essential Ingredients
The next step is learning what each brewing ingredient actually does.
Many minecraft potions recipes use materials you may already encounter while exploring, farming, fighting mobs, or visiting other dimensions.
Ingredients that create potion effects
Different ingredients determine the effect produced after brewing.
Some of the most useful ingredients include:
| Ingredient | Common Potion Result |
| Sugar | Swiftness |
| Rabbit's Foot | Leaping |
| Blaze Powder | Strength |
| Glistering Melon Slice | Healing |
| Spider Eye | Poison |
| Ghast Tear | Regeneration |
| Magma Cream | Fire Resistance |
| Pufferfish | Water Breathing |
| Golden Carrot | Night Vision |
| Phantom Membrane | Slow Falling |
This is why potion preparation often starts long before reaching the Brewing Stand.
If you want Fire Resistance, for example, you need access to Magma Cream. Night Vision requires a Golden Carrot, while Slow Falling requires a Phantom Membrane.
Planning ahead saves time.
Instead of returning to search for ingredients after every brewing session, create a dedicated storage area beside your Brewing Stand and gradually stock the materials you use most often.
Potion modifiers and what they change
Effect ingredients determine what a potion does. Modifiers determine how certain potions behave.
The most important modifiers to recognize are:
- Redstone Dust: extends the duration of compatible potions.
- Glowstone Dust: increases the potency of compatible potions.
- Gunpowder: turns compatible regular potions into Splash Potions.
- Dragon's Breath: turns compatible Splash Potions into Lingering Potions.
- Fermented Spider Eye: corrupts certain potions into different effects.
Redstone and Glowstone are especially important because they serve different purposes.
Imagine that you have a potion with an effect you want to maintain for longer. Redstone may provide the more useful modification.
If you need a stronger version of a compatible effect for a shorter encounter, Glowstone may be the better choice.
However, not every potion accepts every modifier. You should always consider the specific potion before spending ingredients.
All Minecraft Potion Recipes in One Table
Players searching for minecraft all potion recipes usually want one thing: a reference they can quickly check while brewing.
The following table covers the core progression behind many of Minecraft's most useful brews.
Positive and utility potion recipes
Most of these begin with an Awkward Potion.
| Potion | Base | Brewing Ingredient | Main Effect |
| Swiftness | Awkward Potion | Sugar | Increases movement speed |
| Leaping | Awkward Potion | Rabbit's Foot | Improves jumping |
| Strength | Awkward Potion | Blaze Powder | Increases melee damage |
| Healing | Awkward Potion | Glistering Melon Slice | Restores health instantly |
| Regeneration | Awkward Potion | Ghast Tear | Restores health over time |
| Fire Resistance | Awkward Potion | Magma Cream | Protects against fire and lava |
| Water Breathing | Awkward Potion | Pufferfish | Allows underwater breathing |
| Night Vision | Awkward Potion | Golden Carrot | Improves visibility in darkness |
| Slow Falling | Awkward Potion | Phantom Membrane | Slows falling and prevents fall damage |
This table provides a useful starting point for players searching for all minecraft potion recipes, but there are additional brewing paths to understand.
Some effects come from corruption rather than adding an ingredient directly to an Awkward Potion.
Negative and corrupted potion recipes
Fermented Spider Eye is important because it can alter certain potion effects.
Instead of simply strengthening or extending a potion, corruption can transform it into something different.
Examples include transformations associated with effects such as:
- Night Vision → Invisibility
- Healing → Harming
- Poison → Harming
- Swiftness → Slowness
- Leaping → Slowness
This creates an important brewing rule: do not assume every final potion comes directly from an Awkward Potion.
The all potion recipes in minecraft system contains branching paths. Invisibility is one of the clearest examples because you first create Night Vision and then corrupt that potion with a Fermented Spider Eye.
Once you understand those branches, even advanced brewing becomes much easier.
Invisibility Potion Minecraft Recipe Step by Step
The invisibility potion minecraft recipe is one of the most frequently searched brewing combinations because its path is less obvious than something like Strength.
You cannot simply place a dedicated "invisibility ingredient" into an Awkward Potion.
Instead, you need to brew Night Vision first.
How to make a Potion of Night Vision first
Begin with the standard potion foundation.
You will need:
- Brewing Stand
- Blaze Powder
- Water Bottle
- Nether Wart
- Golden Carrot
- Fermented Spider Eye
Then follow these steps:
- Place Blaze Powder in the Brewing Stand's fuel slot.
- Place your Water Bottles into the bottle slots.
- Brew Nether Wart into the Water Bottles to create Awkward Potions.
- Add a Golden Carrot to create Potions of Night Vision.
- Add a Fermented Spider Eye to the Night Vision potions.
- Wait for brewing to finish and collect your Potions of Invisibility.
The important part is the Night Vision stage.
If you remember that Invisibility is produced by corrupting Night Vision, the recipe becomes much easier to recall.
Turning Night Vision into Invisibility
A Fermented Spider Eye changes Night Vision into Invisibility.
That transformation also demonstrates why keeping Fermented Spider Eyes near your brewing area is useful. They are not simply ingredients for "bad" potions; they can be essential for valuable utility effects.
You can then modify compatible Invisibility potions further depending on what you need.
For multiplayer situations, Invisibility can introduce interesting tactical possibilities. However, players should remember that potion effects do not automatically make every equipped or carried visual element disappear in every gameplay situation.
Therefore, test your setup before relying on invisibility during an important encounter.
Potion Recipes Minecraft Players Should Brew First
With so many possible effects, new players may wonder which potions in minecraft recipes are worth learning first.
The answer depends on where you are going.
Best potions for exploration and survival
Fire Resistance is one of the most useful options for Nether exploration.
Lava is everywhere in the Nether, and an unexpected fall can quickly become fatal. Fire Resistance provides a valuable safety option when traveling around lava-heavy areas.
Water Breathing serves a similar role underwater.
If you are planning an extended underwater adventure, being able to breathe without constantly returning to the surface can make exploration much more manageable.
Night Vision also works well in dark environments, including underwater areas where visibility can become difficult.
Slow Falling is valuable when heights become the main danger.
A practical exploration kit could include:
- Fire Resistance for the Nether
- Water Breathing for underwater exploration
- Night Vision for dark environments
- Slow Falling for dangerous heights
- Healing for emergency recovery
- Regeneration for sustained recovery
The best potion is therefore not necessarily the strongest one.
It is the potion that solves the problem you are most likely to encounter.
Best potions for combat
Combat changes the priorities.
Strength can improve offensive potential, while Healing provides immediate recovery. Regeneration can be useful when you need health restored over time.
Swiftness can also influence positioning.
For multiplayer combat, Splash Potions become particularly interesting because they can be thrown instead of consumed normally.
Negative Splash Potions can be used offensively, while beneficial Splash Potions can affect players or entities within their area.
That flexibility is why learning minecraft potion recipes can become valuable even after you already have strong equipment.
Potions add another strategic layer beyond weapons and armor.
Minecraft Potions Recipes: Splash and Lingering Potions
Regular drinkable potions are only one format.
Minecraft also allows compatible potions to become throwable Splash Potions and area-based Lingering Potions.
How to make Splash Potions
The basic conversion is simple:
Regular Potion + Gunpowder → Splash Potion
Instead of drinking the result, you throw it.
When the bottle breaks, its effect can apply around the impact area. That makes Splash Potions useful when you need an effect delivered quickly or applied to another target.
Splash Potions can be particularly practical during combat because drinking takes time.
However, throwing a potion also requires positioning. You need to consider where it will land and which entities may be affected.
How to make Lingering Potions
Lingering Potions add another stage:
Splash Potion + Dragon's Breath → Lingering Potion
Rather than producing only the immediate splash interaction, the potion creates a lingering effect area.
Entities entering or remaining within that area can receive the associated effect.
That makes Lingering Potions more about controlling space.
A Splash Potion focuses on where the bottle lands. A Lingering Potion makes the affected area itself relevant for a period after impact.
Potions in Minecraft Recipes and Brewing Modifiers
Understanding modifiers is what turns a basic brewer into an efficient one.
Instead of producing the default version of every potion, you can modify compatible effects according to the challenge ahead.
Redstone vs. Glowstone
The simplest distinction is duration versus potency.
Redstone Dust generally extends the duration of compatible potion effects.
Glowstone Dust generally increases the strength of compatible effects.
That means the choice depends on your objective.
For exploration, additional duration can be extremely useful. A longer-lasting utility potion means fewer interruptions and fewer bottles required during a trip.
For short combat encounters, additional potency may be more valuable.
However, you cannot simply stack every modifier indefinitely. Brewing has specific valid transformations, so plan the final potion before consuming your ingredients.
Fermented Spider Eye conversions
Fermented Spider Eye behaves differently.
It corrupts compatible potions, changing their effect rather than simply extending or strengthening them.
The Night Vision-to-Invisibility transformation is particularly important because Invisibility is a useful effect created through corruption.
Healing can also become Harming, demonstrating how a beneficial potion can be converted into an offensive one.
Keeping the brewing paths organized helps prevent mistakes.
Label storage areas for base ingredients, effect ingredients, and modifiers so that you do not accidentally add the wrong material to a valuable batch.
How to Brew Minecraft Potions Faster
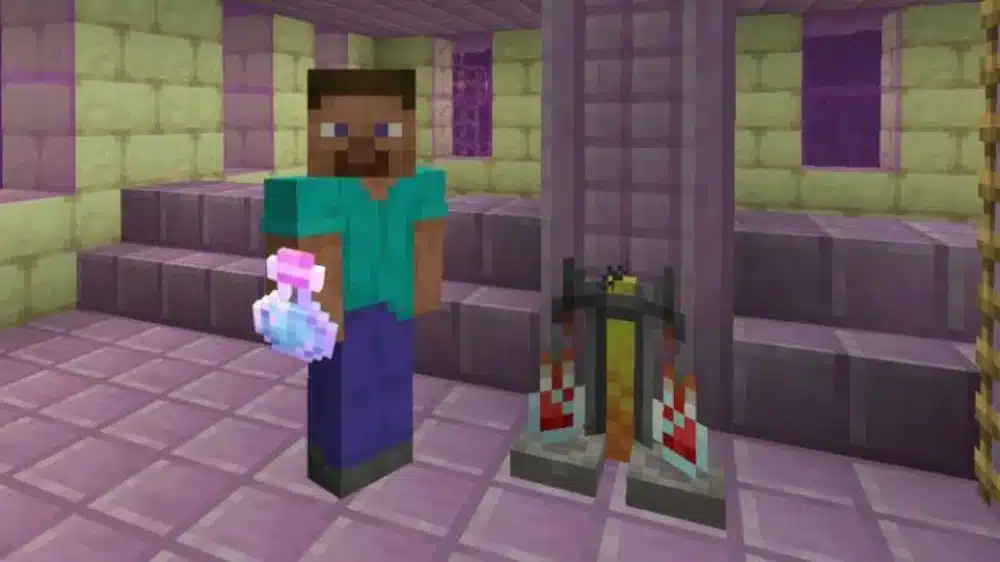
Once you understand minecraft potions recipes, efficiency becomes the next challenge.
A good brewing room reduces the time spent searching through chests and allows you to prepare several potions whenever you need them.
Brewing multiple bottles simultaneously
Use all available bottle positions whenever practical.
If you know you will need several Fire Resistance potions, brewing multiple bottles through the same process is more convenient than repeatedly producing one bottle at a time.
Keep Glass Bottles and a water source nearby.
Then organize frequently used ingredients within easy reach of the Brewing Stand.
A basic storage system can separate:
- Nether Wart
- Blaze Powder
- Potion-effect ingredients
- Redstone Dust
- Glowstone Dust
- Gunpowder
- Fermented Spider Eyes
- Finished potions
This becomes increasingly useful as your potion collection grows.
Building a potion brewing station
A dedicated brewing station does not need to be enormous.
The goal is accessibility.
Place your Brewing Stand close to ingredient storage, keep a water source available, and maintain enough Blaze Powder to avoid discovering that your stand has no fuel immediately before an important adventure.
You can also separate finished potions by purpose.
For example, one chest might contain exploration potions, another combat brews, and another Splash or Lingering variants.
This small organizational change makes potion preparation significantly faster.
Minecraft Potion Recipe Quick Reference
Players looking for potions and recipes minecraft information often need a quick reminder rather than a complete explanation.
The basic brewing flow provides exactly that.
Base potion flow
Remember this sequence:
Water Bottle → Nether Wart → Awkward Potion → Effect Ingredient → Optional Modifier
For example:
Water Bottle → Nether Wart → Awkward Potion → Magma Cream → Fire Resistance
Or:
Water Bottle → Nether Wart → Awkward Potion → Golden Carrot → Night Vision → Fermented Spider Eye → Invisibility
These chains make potion recipes minecraft much easier to remember.
Instead of memorizing isolated recipes, remember how each branch develops.
Potion modifier quick reference
| Modifier | Purpose |
| Redstone Dust | Extends compatible potion duration |
| Glowstone Dust | Increases compatible potion potency |
| Gunpowder | Creates a Splash Potion |
| Dragon's Breath | Converts compatible Splash Potions into Lingering Potions |
| Fermented Spider Eye | Corrupts certain effects |
This table is useful to keep nearby while brewing because modifiers are where many recipe mistakes happen.
Always decide what final potion you want before applying the modifier.
Minecraft Potions and Multiplayer Performance With ExitLag
Knowing minecraft potions and recipes can help you prepare for multiplayer survival and PvP, but potion knowledge and network performance solve two completely different problems.
Your potion can improve an in-game status effect. It cannot fix an unstable internet route.
Why connection stability matters in multiplayer Minecraft
Timing can matter during online combat.
Switching items, positioning around another player, using a Splash Potion, attacking, retreating, or reacting to danger all depend on the multiplayer session communicating correctly with the server.
Connection problems can therefore become especially noticeable during fast encounters.
This does not mean every delay comes from the internet. Low frame rates, overloaded hardware, server performance, mods, and other factors can also affect the experience.
Identifying the source of the problem is important.
Using ExitLag for online Minecraft sessions
ExitLag focuses on the network side of online gaming on PC and Mobile.
Its Real-Time Optimization technology evaluates routes while you play, while Multipath Connection can send packets through multiple routes to improve connection stability in supported scenarios.
Traffic Shaper can help prioritize game traffic, while Multi-Internet provides additional options for compatible connection setups.
For supported Minecraft multiplayer sessions, the objective is to optimize the route between the player and the online service rather than changing anything inside Minecraft itself.
ExitLag does not increase potion duration, change brewing recipes, or make a Strength potion stronger.
Instead, it is designed to help reduce connection instability and inefficient routing so players can focus on using their preparations when they matter.
FAQ
Once you understand the core system, most brewing questions become much easier to answer.
Here are quick solutions to some of the most common questions.
You need a Brewing Stand, Blaze Powder for fuel, bottles containing water, and the appropriate brewing ingredients.
Nether Wart is particularly important because it creates the Awkward Potion used as the base for many useful recipes.
Add Nether Wart to Water Bottles using a fueled Brewing Stand.
The result is an Awkward Potion, which can then receive ingredients such as Magma Cream, Sugar, Golden Carrot, or Blaze Powder to create useful effects.
Redstone Dust extends the duration of compatible potions.
It is especially useful when you value a longer effect more than increased potency.
Glowstone Dust increases the potency of compatible potion effects.
Not every potion supports this transformation, so check the brewing path before applying it.
First brew an Awkward Potion using Nether Wart.
Add a Golden Carrot to create Night Vision, then brew a Fermented Spider Eye into the Night Vision potion to transform it into Invisibility.
Add Gunpowder to a compatible regular potion using a Brewing Stand.
The resulting Splash Potion can be thrown instead of consumed normally.
Start with a compatible Splash Potion and brew it with Dragon's Breath.
The resulting Lingering Potion creates an effect area after being thrown.
You can, but understanding the brewing structure is easier.
Learn the Awkward Potion foundation, remember the main effect ingredients, and understand what Redstone, Glowstone, Gunpowder, Dragon's Breath, and Fermented Spider Eye do.
From there, all minecraft potion recipes become much easier to navigate.
Minecraft Potions and Recipes for Better Survival
Mastering minecraft potions and recipes is ultimately about preparation. Potions become much more valuable when you choose them for a specific challenge instead of brewing random effects and leaving them in storage.
Preparing potions before difficult adventures
Think about where you are going before approaching the Brewing Stand.
A Nether expedition may justify Fire Resistance. An underwater adventure suggests Water Breathing and Night Vision. A dangerous battle might make Healing, Regeneration, Strength, or Swiftness more useful.
This simple habit prevents wasted inventory space.
It also encourages you to maintain ingredients before they become urgently necessary.
Once you have a reliable supply of Nether Wart, Blaze Powder, bottles, and common effect ingredients, preparing for an adventure becomes a quick routine rather than a lengthy project.
Building a reliable potion collection
Organize your ingredients, brew multiple bottles when practical, and keep a selection of exploration and combat potions ready for emergencies. Learning the major modifiers will then let you customize those brews for duration, potency, throwing, or lingering effects.
For multiplayer players, preparation also includes the connection behind the session. ExitLag can optimize supported PC and Mobile connections using technologies designed around route optimization and stability, while your equipment and potions handle the in-game challenge.
With a stocked brewing station and a clear understanding of the recipe tree, minecraft potions and recipes stop feeling complicated. They become one of Minecraft's most useful preparation systems, giving you more ways to survive, explore, fight, and adapt to whatever your next adventure brings.
All game images used in this blog belong to Mojang Studios and Microsoft. They are used for informational/educational purposes only and do not imply endorsement or affiliation with the rights holders.