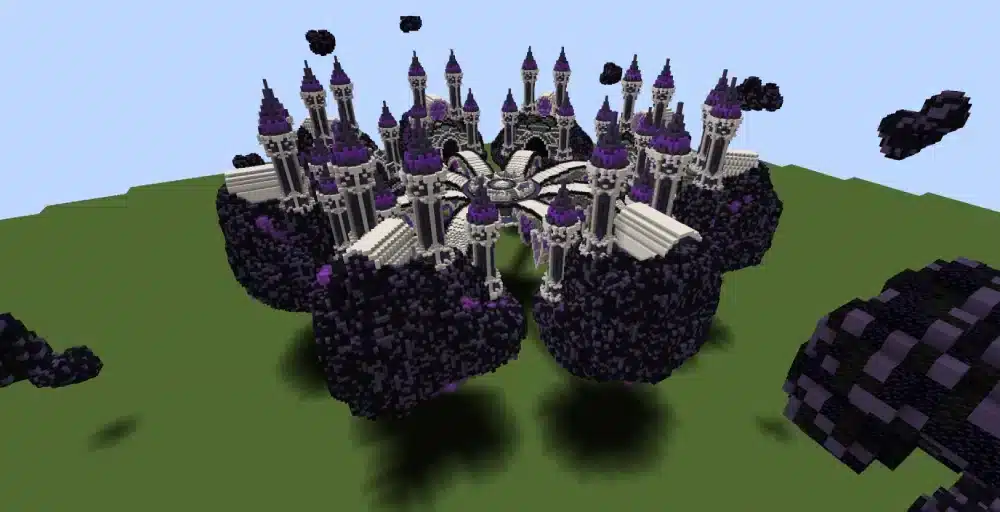
If you want to create massive cities, detailed castles, or complex redstone machines, Minecraft schematics are the fastest way to turn ideas into fully built projects. Instead of placing every block manually, you can import entire structures in seconds and scale your creativity without limits.
Minecraft schematics allow players to copy, share, and paste entire builds across worlds. Whether you are working with Minecraft blueprints, advanced building plans, or large community-made Minecraft structures, schematics streamline your workflow and eliminate repetitive tasks.
What is Minecraft schematics?

Minecraft schematics are files that store block data from a selected area in your world. These files can then be imported into another world using tools like world edit, letting you instantly recreate complex builds without starting from scratch.
Understanding how Minecraft schematics work is essential if you want to build efficiently. Instead of manually copying dimensions from Minecraft blueprints, you can directly import accurate building plans and focus on customization rather than reconstruction.
Many professional builders rely on schematic downloads to prototype mega bases, PvP arenas, survival hubs, and decorative cities. Consequently, learning to manage and organize your schematic library becomes just as important as knowing how to build.
Minecraft Schematics Explained
How Schematic Files Work
Minecraft schematics are saved as data files that record block types, positions, and sometimes tile entity data such as chests or command blocks. When exported, the file captures a 3D selection defined by the player.
Once saved, the schematic can be transferred to another world. Using world edit or compatible mods, players paste the file into a new location. As a result, entire castles or farms can appear instantly.
Unlike simple Minecraft blueprints, which only show reference images or layered block guides, schematics contain exact block placement data. Therefore, precision remains intact across multiple worlds.
Why Builders Use Minecraft Schematics
There are several reasons why Minecraft schematics are preferred over manual building:
- Speed when creating large projects
- Accuracy when replicating complex designs
- Easy sharing between players
- Backup security for important builds
- Testing layouts before survival implementation
Additionally, schematic downloads allow players to experiment with creative-mode builds before investing resources in survival mode.
Minecraft Blueprints vs Building Plans vs Schematics
Visual Blueprints
Minecraft blueprints usually refer to image-based guides or layered building tutorials. These are ideal for beginners who want step-by-step guidance.
However, blueprints require manual block placement. That means time investment remains high for large Minecraft structures.
Technical Building Plans
Building plans often include dimension charts, block counts, and structural breakdowns. They are useful for resource planning and scaling projects.
Still, they do not automate construction.
Full Schematic Downloads
Schematic downloads eliminate the need for manual reconstruction. By importing the file directly, you replicate the structure instantly.
Below is a comparison table to clarify the differences:
| Feature | Minecraft Blueprints | Building Plans | Minecraft Schematics |
| Automation | No | No | Yes |
| Exact Block Data | Partial | Yes (listed) | Yes (embedded) |
| Requires Manual Building | Yes | Yes | No |
| Ideal For | Learning builds | Planning resources | Fast replication |
| Multiplayer Use | Yes | Yes | Yes |
Because of this automation advantage, Minecraft schematics are widely used by content creators and server administrators.
How to Use World Edit with Minecraft Schematics
Installing World Edit
World edit is one of the most powerful tools for handling Minecraft schematics. It allows players to select regions, copy them, and export schematic files.
To install world edit, you typically need:
- A compatible mod loader (Forge or Fabric)
- The correct world edit version for your Minecraft build
- Access to the mods folder
After installation, you can use in-game commands to manage schematics.
Exporting and Importing Schematics
To export a structure:
- Select the first corner of your build
- Select the opposite corner
- Use the save schematic command
To import:
- Load the schematic file
- Position it using placement tools
- Paste it into the world
When working with very large Minecraft structures, performance can temporarily drop. Therefore, stable connectivity and optimized routing become essential in multiplayer scenarios.
For official documentation and advanced command references, you can consult the Minecraft Wiki: https://Minecraft.wiki
Where to Find Schematic Downloads
Community Platforms
Many websites specialize in schematic downloads. These communities share castles, cities, redstone machines, farms, and decorative builds.
Before downloading, always verify compatibility with your Minecraft version.
Creator Marketplaces
Some professional builders sell premium Minecraft schematics with advanced detailing and optimized layouts.
These often include:
- Detailed spawn hubs
- PvP arenas
- Survival starter bases
- Mega builds
- Themed Minecraft structures
Using pre-tested building plans from experienced creators reduces design errors and saves time.
Best Uses for Minecraft Schematics
Survival Mode Optimization
Players frequently import Minecraft schematics into creative mode first. After testing functionality, they recreate the build in survival.
This method helps calculate material requirements and optimize efficiency.
Server Infrastructure
Server administrators rely heavily on schematics to deploy:
- Spawn areas
- Lobby systems
- Minigame maps
- Event arenas
By storing backups of critical Minecraft structures, server owners ensure rapid recovery if something breaks.
Creative Mega Projects
Large collaborative builds become easier when teams share schematic downloads. Instead of rebuilding sections manually, teams exchange files.
This workflow drastically reduces production time.
Common Mistakes When Using Minecraft Schematics
Version Incompatibility
Not all Minecraft schematics work across versions. Block IDs and data structures may change.
Always confirm version compatibility before importing.
Overlapping Terrain
Pasting a schematic without clearing terrain can result in clipping or structural corruption.
Use world edit commands to prepare the area first.
Ignoring Performance Limits
Extremely large Minecraft structures can cause temporary lag when pasted. Consequently, avoid importing massive builds on low-performance systems.
Optimized routing and connection stability help reduce multiplayer synchronization delays during these operations.
Advanced Workflow for Professional Builders
Professional creators combine Minecraft blueprints, technical building plans, and Minecraft schematics for maximum efficiency.
The workflow typically looks like this:
- Concept sketch using blueprint references
- Prototype in creative mode
- Export as schematic file
- Test placement in different terrains
- Share or deploy on servers
By integrating world edit into this process, builders achieve consistent results across projects.
Moreover, organizing your schematic downloads into categorized folders improves productivity. Group builds by theme, scale, or function.
Why Minecraft Schematics Are Essential for Large Projects
When building massive cities or themed worlds, manual construction becomes inefficient. Minecraft schematics solve that limitation by allowing instant duplication and relocation.
Because they preserve every block, they guarantee structural accuracy. In competitive or multiplayer environments, this consistency becomes a strategic advantage.
Additionally, they support collaboration. Teams can work on different sections of a project and merge them later using world edit.
Finally, Minecraft schematics encourage experimentation. Builders can test bold designs without risking survival resources.
As your projects scale, mastering Minecraft schematics becomes less of an option and more of a necessity for efficient building and professional-level world design.
Advanced Optimization Strategies for Minecraft Schematics
Organizing a Professional Schematic Library
As your collection of Minecraft schematics grows, organization becomes critical. Without structure, finding the right file for a project can waste valuable time.
Create folders based on categories such as:
- Survival utility builds
- Decorative Minecraft structures
- Redstone contraptions
- PvP and minigame maps
- Terrain enhancements
Additionally, rename schematic downloads using clear naming conventions. Include dimensions, version compatibility, and purpose in the file name.
For example, instead of “castle1.schem”, use “medieval_castle_150x150_v1_20.schem”. This small change dramatically improves workflow efficiency.
Scaling Large Minecraft Structures Safely
When importing extremely large Minecraft schematics, always test in a temporary creative world first. Massive pastes can affect chunk loading and server tick rate.
Before pasting:
- Clear the terrain properly.
- Ensure sufficient system memory allocation.
- Verify version compatibility.
- Backup your world.
These precautions prevent corruption and allow safe experimentation with ambitious building plans.
Using Minecraft Schematics for Multiplayer Servers
Competitive Advantages for Server Owners
Multiplayer environments demand speed and reliability. Server administrators use Minecraft schematics to deploy:
- Seasonal event hubs
- Ranked PvP arenas
- Adventure maps
- Marketplace districts
Instead of rebuilding content from scratch, administrators reuse tested Minecraft structures, guaranteeing consistent quality.
Furthermore, optimized routing ensures that when players join or large schematic downloads are applied, synchronization remains stable.
Collaborative Team Building
Large communities often divide projects into sections. Each builder works independently, exports their section as a schematic, and later merges everything together using world edit.
This modular workflow allows teams to:
- Maintain structural consistency
- Avoid overlapping edits
- Accelerate development cycles
- Reduce rebuild time
As a result, Minecraft schematics enable professional-level production pipelines even within casual communities.
Performance Considerations When Using World Edit
Handling Massive Paste Commands
World edit is powerful, but improper use can cause lag spikes. When pasting large Minecraft schematics, consider using incremental placement commands if available.
Breaking the structure into smaller sections reduces processing load.
Additionally, avoid executing heavy commands during peak multiplayer activity.
Memory and Hardware Optimization
If you frequently use schematic downloads, allocate more RAM to Minecraft. Large Minecraft structures contain thousands or even millions of blocks.
Lower-end systems may experience temporary freezes during paste operations.
To mitigate issues:
- Increase allocated memory in launcher settings
- Close background applications
- Use performance optimization mods
These adjustments improve stability when handling advanced building plans.
Creative Applications Beyond Basic Building
Terrain Transformation
Minecraft schematics are not limited to buildings. You can export entire terrain sections, including mountains, forests, and custom biomes.
This makes it possible to:
- Reuse handcrafted landscapes
- Duplicate terraforming work
- Create consistent themed worlds
Advanced builders combine world edit brushes with schematic exports to refine terrain before final deployment.
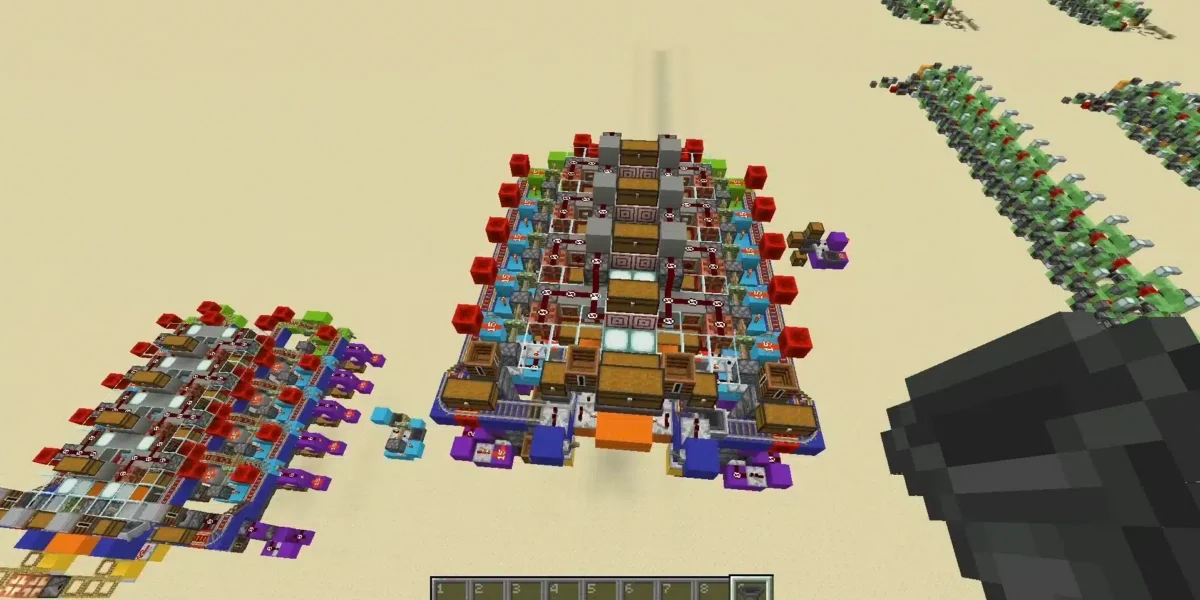
Redstone Engineering
Complex redstone machines benefit enormously from Minecraft schematics. Instead of rebuilding intricate wiring systems, you can replicate them instantly.
This is particularly useful for:
- Automatic farms
- Sorting systems
- Hidden doors
- Puzzle mechanics
By preserving exact block data, schematics prevent wiring mistakes that commonly occur when following Minecraft blueprints manually.
Comparing Manual Building vs Minecraft Schematics
Many players still prefer traditional building. However, understanding the efficiency gap is important.
Manual construction is ideal for:
- Skill development
- Learning structure design
- Survival immersion
Meanwhile, Minecraft schematics excel at:
- Large-scale duplication
- Time-sensitive server launches
- Backup restoration
- Professional map creation
The most effective builders combine both methods. They prototype manually, refine using building plans, and finalize with schematic exports.
Security and Backup Strategies

Protecting Your Work
Always maintain backup copies of essential Minecraft schematics. Store them both locally and in cloud storage.
Losing a large build without a schematic backup can mean weeks of lost progress.
Version Control Practices
When updating a structure, create incremental versions:
- castle_v1
- castle_v2
- castle_v3_final
This approach ensures you can revert changes if necessary.
Professional creators treat Minecraft schematics like development assets rather than casual files.
The Future of Minecraft Schematics and Advanced Building
As the Minecraft community evolves, tools become more sophisticated. Improved mod support, better integration with world edit, and advanced file formats continue to enhance how Minecraft schematics function.
Moreover, cross-platform compatibility is expanding. Builders can increasingly move Minecraft structures between servers, worlds, and collaborative projects.
Because efficiency and creativity go hand in hand, schematics remain central to ambitious projects.
Ultimately, Minecraft schematics empower players to build without limits, experiment safely, and deploy massive creations with professional precision.
Conclusion About Minecraft Schematics
Reduced packet loss and optimized routing mean fewer lag spikes when loading large Minecraft structures or using world edit commands. In this context, ExitLag helps ensure stable connectivity while downloading Minecraft schematic files, importing large builds, and playing on multiplayer servers.
FAQ
Minecraft schematics are used to save, copy, share, and paste complete builds across worlds. They allow players to instantly recreate detailed Minecraft structures without rebuilding manually.
They are typically pasted in creative mode using world edit. However, players often test building plans in creative before reconstructing them manually in survival.
Schematic downloads are safe when obtained from trusted community platforms. Always verify compatibility and scan files if downloaded from unknown sources.
Minecraft blueprints are visual guides that require manual building. Minecraft schematics contain exact block data and allow automated placement using tools like world edit.
Yes. Extremely large imports can temporarily affect performance. Proper preparation, hardware optimization, and stable connectivity reduce these issues.
Got questions or want to connect with other players? Join the conversation at the ExitLag Forum!