Every extraction run in Arc Raiders eventually comes down to who controls the terrain. The Arc Raiders Jump Mine is one of the sneakiest tools for doing exactly that. It rewards patience, punishes careless movement, and turns a quiet corridor into a killzone.
Most new Raiders hear the nickname “Jump Mine” and assume it is a separate gadget from everything else in the crafting tree. In reality, the Arc Raiders Jump Mine is the community name for the Explosive Mine, and understanding that link changes how you shop, craft, and plan your loadout.
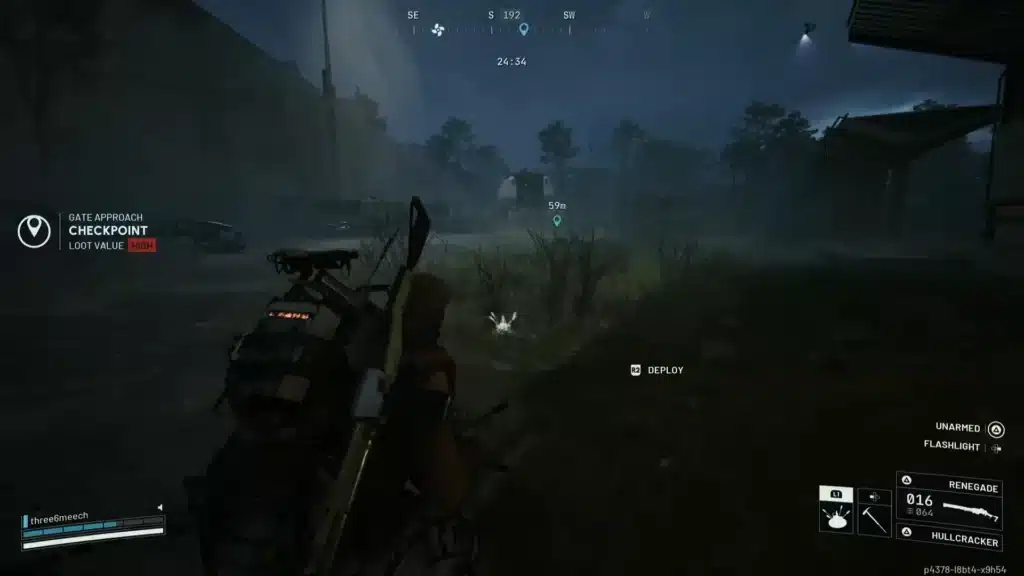
So what exactly does it do? The Jump Mine Arc Raiders players rely on is a proximity trap that pops upward before detonating, spraying damage across a wide radius the instant an enemy or ARC unit gets close. It works on the ground, on doorways, and even stuck directly onto the bodies of large ARC machines for guaranteed follow-up damage.
This guide breaks down where to find it, how to craft it, where to place it for maximum value, and how to avoid it when the enemy team sets one for you. We will also cover the trial-style damage challenges that reward smart Jump Mine usage, plus the mistakes that get new Raiders killed by their own trap.
Arc Raiders Jump Mine Basics Every Raider Should Know
Before diving into placement strategy, it helps to understand what this gadget actually is under the hood. The Jump Mine Arc Raiders community talks about is technically listed in your inventory as the Explosive Mine.
It earned its nickname because of the way it behaves the moment it triggers. Instead of exploding flat on the ground, it launches upward slightly and then detonates, which increases the blast radius against standing targets.
What Makes The Jump Mine Different From Other Traps
Unlike stun-based gadgets, the Jump Mine deals real damage rather than crowd control. That single distinction changes how you should use it in a fight.
- Direct damage output: It hurts enemies and ARC units instead of just delaying them.
- Proximity trigger: No manual detonation is required, it fires when something walks close enough.
- Placeable on ARC bodies: Sticking one directly onto a large machine guarantees the blast lands.
- Rare tier item: It sits above basic traps in both cost and payoff.
Core Stats And Behavior
The mine sits quietly until a trigger radius is crossed. Once triggered, it pops and explodes almost instantly, giving targets very little time to react.
Therefore, positioning matters more than raw stats. A mine placed in an open field is far less effective than one tucked behind a doorway or blind corner where reaction time is minimal.
How Do You Get The Jump Mine In Arc Raiders?
This is the question most players search for first, and thankfully the answer is straightforward once you know the two paths available. You can either scavenge one directly or craft it yourself at your base.
Scavenging is the faster route early on, since Explosive Mines and their blueprint occasionally appear as loot inside buildings, ARC nests, and supply crates scattered across the map. However, relying purely on luck is inconsistent for regular loadouts.
Where To Find The Jump Mine Blueprint
The blueprint for the Arc Raiders Jump Mine can be scavenged in the field, but there is also a guaranteed vendor path. Nomadic Envoy Ermal offers the blueprint in exchange for specific turn-in materials.
To unlock it through the vendor, you generally need to gather:
- Leaper Pulse Units, harvested from smaller ARC enemies after combat.
- Pop Triggers, commonly picked up from mechanical loot and dismantled gadgets.
- Steel Springs, found in workshops, garages, and industrial loot zones.
Once turned in, the blueprint unlocks permanently, so you never have to repeat the trade.
How To Craft It Once You Have The Blueprint
Crafting happens at your Explosives Station, and you will need it upgraded to at least tier three before the recipe becomes available. Furthermore, the ingredients are things you likely already collect during normal runs.
- Explosive Compound: The core damage ingredient, usually salvaged from ARC wreckage.
- Sensors: Small electronic parts pulled from broken machines and tech loot.
- Explosives Bench Tier 3: The station upgrade required before the recipe even appears.
Once you have both the blueprint and the materials, crafting takes seconds. Consequently, it is worth keeping two or three in your inventory at all times rather than crafting one right before a raid.
Best Uses For The Jump Mine Arc Raiders Players Rely On
Knowing how to get the item is only half the picture. Using it correctly is where most of the value actually comes from, especially against tougher ARC units.
Large, slow-moving machines make the ideal target because they cannot dodge or reposition quickly. Placing a mine directly on a Bastion’s core, for example, guarantees a huge chunk of damage the moment it triggers.
Which ARC Targets Work Best
Some enemies simply do not have the mobility to avoid a well-placed Jump Mine. Focusing on these targets consistently outperforms spreading mines across smaller, faster enemies.
- Bastions: Slow and heavily armored, but a mine on the core hits hard.
- Bombardiers: Limited mobility makes them easy to trap repeatedly.
- Shredders: A favorite for damage farming thanks to predictable movement patterns.
- Small ground ARCs: Useful in groups, but individually less rewarding than bigger targets.
Placement Tricks For PvP Encounters
Against other Raiders, the Jump Mine becomes a denial tool rather than a damage farm. Placing one at a doorway, stairwell, or extraction point chokepoint forces enemies to slow down or take a hit.
Indeed, many experienced players stack a Jump Mine with a secondary trap nearby, so disarming one exposes the player to the other. This layered approach is what separates casual placements from truly deadly ones.
Arc Raiders Jump Mine Compared To Other Traps
Choosing the right gadget for a given fight is easier once you see how the Jump Mine stacks up against its main alternatives. Below is a quick comparison to guide your loadout decisions.
| Gadget | Primary Effect | Best Against | Craft Tier |
|---|---|---|---|
| Jump Mine (Explosive Mine) | Direct explosive damage | Large, slow ARC units | Rare |
| Jolt Mine | Stuns Raiders and ARC units | 1v1 defense, ambush prevention | Rare |
| Gas Mine | Lingering damage cloud | Area denial, chokepoints | Uncommon |
| Blaze Grenade | Fire area denial, mine destruction | Countering enemy traps | Common |
As the table shows, the Jump Mine is your go-to pick whenever raw damage matters more than crowd control. Meanwhile, the Jolt Mine remains the better choice when survival and stalling an enemy push is the priority.
Is There A Reliable Way To Counter A Jump Mine?
Yes, and knowing the counterplay is just as valuable as knowing how to place one yourself. The first defense is simply slowing down in unfamiliar rooms and watching the floor for a slight bump or wire.
Blaze Grenades are the most reliable all-purpose answer, since they can trigger or destroy many traps through doors, walls, and room edges without exposing you to the blast. This makes them a smart addition to any loadout built around clearing trap-heavy areas.
Manual Disarming Explained
If you do not have a Blaze Grenade handy, manual disarming is still possible. Crouch-walking slowly toward a spotted mine and interacting at close range lets you defuse it safely in most situations.
- Move slowly: Sprinting near a mine risks triggering it before you can react.
- Stay crouched: Reduces your profile and the chance of an accidental trigger.
- Interact at close range: The disarm prompt only appears once you are close enough.
- Check surroundings first: Disarming while exposed to gunfire is rarely worth the risk.
Does The Jump Mine Trial Reward Extra Damage?
Seasonal trial challenges frequently ask players to deal damage using the Jump Mine, and this is where target selection becomes critical. Choosing the wrong enemy wastes time and mines without meaningful score progress.
The trick is picking a large, low-mobility ARC, controlling its movement into a chosen spot, and then creating a repeatable damage loop. A single mine planted on a Bastion’s core can earn several hundred trial points in one hit, which adds up fast across a run.
Pro Tips: Arc Raiders Jump Mine
- Target slow ARCs first: Bastions and Bombardiers cannot escape the blast radius, so your success rate stays high.
- Stick mines directly on cores: Attaching a mine to an ARC’s body guarantees the explosion lands exactly where damage counts most.
- Layer traps at chokepoints: Combining a Jump Mine with a secondary gadget punishes players who disarm the first one carelessly.
- Keep the area clear of wreckage: Debris from destroyed ARCs can block movement paths and ruin a carefully planned trap loop.
- Always carry a spare: Crafting mid-fight is rarely realistic, so stock two or three before heading into a raid.
Common Mistakes Arc Raiders Jump Mine Players Make
- Placing mines in open fields: Enemies simply walk around an exposed mine. Fix: use corridors, doorways, or blind corners where reaction time is minimal.
- Ignoring their own traps: Raiders sometimes forget where they placed a mine and trigger it themselves. Fix: mentally track every placement during a fight, especially while retreating.
- Targeting fast, small ARCs for trial damage: Small units dodge and scatter, wasting mines. Fix: focus on slow, heavily armored ARCs like Bastions for guaranteed hits.
- Skipping the vendor blueprint route: Relying only on random scavenging leaves you without mines for entire raids. Fix: farm the turn-in materials once and unlock the blueprint permanently.
Winning Fights With The Arc Raiders Jump Mine Needs A Stable Connection Too
Placing a perfectly timed Jump Mine only matters if your inputs actually register when it counts. Extraction shooters are unforgiving, and a single spike of lag can turn a guaranteed kill into a wasted trap.
This is exactly where ExitLag fits into a serious Raider’s setup. It is not a VPN, it does not encrypt your traffic or hide your IP, and it never touches files outside the games it supports.
Instead, ExitLag continuously analyzes multiple real-time network routes and automatically picks the fastest, most stable path between your PC and the game servers. For a fast-paced shooter like Arc Raiders, that translates into quicker inputs, lower ping, and far less packet loss during firefights.
- Real-time optimization: Reduces delay so your mine placements and gunfights land exactly when you expect them to.
- Multipath technology: Routes traffic through several paths at once, so a single failing connection does not disconnect you mid-raid.
- Multi-Internet support: Combines up to four connections, switching instantly if one drops during a critical extraction.
- AI-powered routing: Automatically selects the best available route with one click, though manual tuning is available for advanced players.
Master the Arc Raiders Jump Mine with Smarter Traps and a Stable Connection
ExitLag currently supports more than 4,000 titles across PC and Mobile, with over 1,500 servers spread across more than 190 countries. It is trusted by more than 30 million users and handles over 18 million optimizations every single week.
If desync or rubber-banding has ever cost you a trap you placed perfectly, it is worth grabbing the ExitLag Download and testing it before your next Arc Raiders session. Just remember never to run it alongside a VPN, since the two working together reduces the optimization benefits rather than improving them.
Ultimately, mastering the Arc Raiders Jump Mine is about combining smart crafting choices, sharp placement instincts, and a connection that keeps up with your reflexes. Learn where to find it, target the right ARCs, layer your traps wisely, and back it all up with a stable route to the servers.
All game images used in this blog post belong to Embark Studios. They are used for informational and educational purposes only and do not imply endorsement or affiliation with the rights holders.
Got questions or want to connect with other players? Join the conversation at the ExitLag Forum!