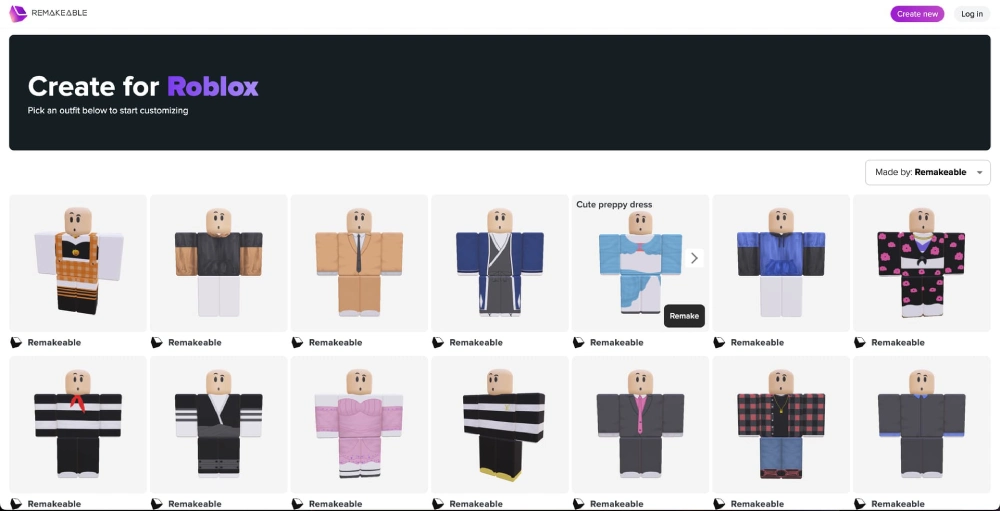
If you’ve ever wondered how to make Roblox clothing, you’re not alone. Thousands of players create and sell their own virtual outfits every day — from simple t-shirts to full fantasy armor sets. It’s one of the most creative ways to engage with Roblox Studio and even earn Robux in the process.
Learning how to make Roblox clothing is easier than it sounds — and it can be done with free tools. Whether you’re an artist, designer, or just exploring new ways to express yourself in-game, this guide will walk you through everything you need to start designing.
Yet about how to make Roblox clothing, do you need a smoother experience when uploading or testing designs? ExitLag helps reduce latency and delays during asset uploads, making your design workflow more stable and responsive.
What Do You Need to Create Clothing in Roblox?
Before you begin, you’ll need to meet a few basic requirements to design and sell clothing on the platform.
Roblox Account With Premium
To upload and monetize your creations, your account must have Roblox Premium. Without it, you can still design clothing but won’t be able to list it for sale or wear custom shirts and pants.
Verified Email and Age
Roblox may restrict certain features to accounts that have:
- A verified email address
- An age of 13+
This ensures access to full customization tools and community features like groups or the avatar shop.
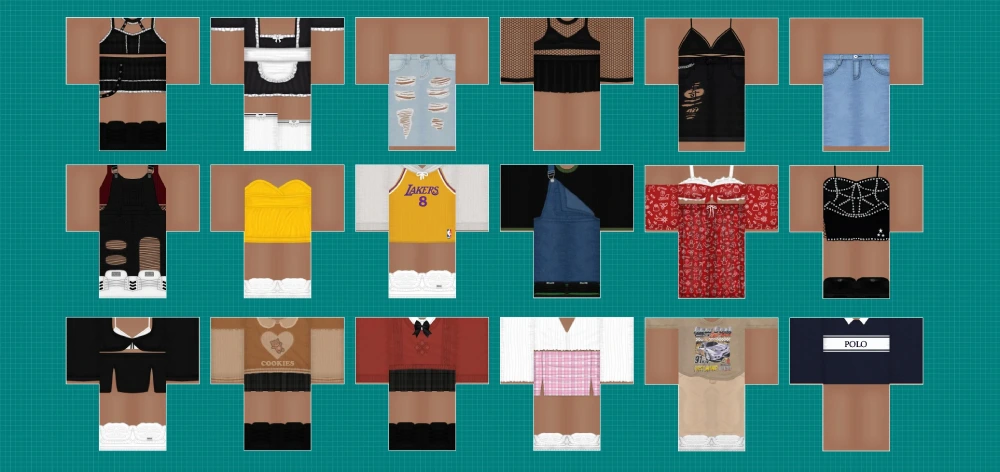
Shirt vs T-Shirt vs Pants: What’s the Difference?
Understanding the Roblox t-shirt vs shirt distinction is key for beginners.
| Type | Customizable? | Requires Template? | Usable in Groups? | Can Be Sold? |
| T-Shirt | Low | No | Yes | Yes (simple) |
| Shirt | Full Body | Yes (3-part layout) | Yes | Yes (premium) |
| Pants | Lower Body | Yes (3-part layout) | Yes | Yes (premium) |
- T-Shirts are basic logos that show on the avatar’s torso.
- Shirts cover the full upper body and sleeves with custom textures.
- Pants cover the legs and feet using a mirrored template.
To make professional clothing, start with shirts and pants, which give you the most creative control.
Check this: Jujutsu Shenanigans: The Ultimate Roblox Anime Game Experience
Choosing Your Tools: What You’ll Need to Design
Before creating anything, download the official Roblox shirt template. This ensures your design will wrap correctly around the avatar model.
Popular Image Editors for Roblox Clothing
- Photopea (free, online)
- GIMP (free, open-source)
- Adobe Photoshop (paid, professional)
Each of these lets you:
- Work with layers
- Export in PNG format
- Align elements using grids
You’ll be uploading your artwork in a 585 × 559 px canvas for shirts and pants. This is the standard size used across all Roblox outfit templates.
Basic Roblox Clothing Tutorial: How to Start Your First Design
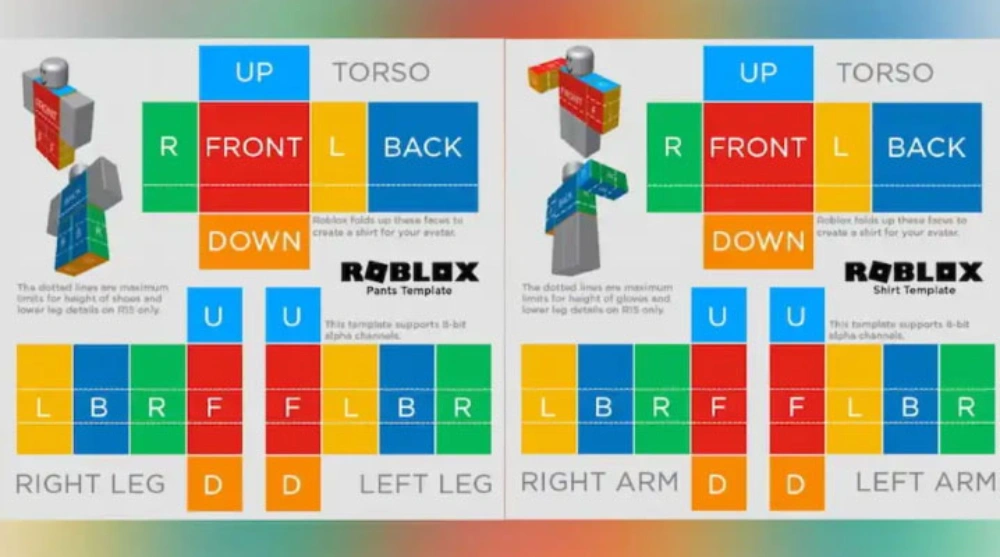
Creating your first shirt or pants item starts with using the downloaded template.
Step-by-Step Design Process:
- Open the template in your image editor.
- Add color and textures to the torso, arms, and legs.
- Avoid stretching or misaligning key parts (like seams or cuffs).
- Save your file as PNG to preserve transparency.
- Test your design on an avatar preview before uploading.
Always save your work with layers intact, so you can return to make edits or create matching sets later.
How to Upload Clothes to Roblox: From File to Marketplace
Once you’ve finished your design, the next step is understanding how to upload clothes to Roblox. Uploading is simple, but it includes some specific requirements — especially if you want to sell your item to other players.
Upload Requirements
Before uploading:
- Ensure your file is saved as PNG
- The resolution must be 585 × 559 pixels
- You must have a Roblox Premium membership
- Your account must comply with community guidelines
Uploading Shirts, Pants, or T-Shirts
Follow these steps to upload your clothing:
- Go to the Create page on the Roblox website
- Under “My Creations”, select either Shirts, Pants, or T-Shirts
- Click “Choose File” and upload your PNG design
- Name your item (e.g., “Red Flame Hoodie”)
- Click “Upload”
Your clothing will appear in your inventory once Roblox moderation approves the design. This process may take a few minutes to several hours.
Roblox Clothing Group Setup: Selling to the Community
To monetize your creations, setting up a roblox clothing group is highly recommended. Selling through a group allows you to showcase multiple items, manage earnings, and promote your designs to a wider audience.
Why Use a Clothing Group?
- Centralized storefront for all your clothing items
- Group funds accumulate in a shared wallet (Robux)
- Allows co-creators or designers to contribute
- Enables community building via group shoutouts and roles
How to Set Up a Roblox Clothing Group
- Visit the Groups page
- Click “Create Group”
- Enter your group name, description, and upload a logo
- Pay the 100 Robux fee
- Customize your group page and assign ranks (e.g., Designer, Admin)
After setup, you can list your shirts or pants under the group’s storefront. Make sure to select the group as the creator during the upload process — otherwise, the item won’t show in the shop.
Pricing and Visibility Settings

After your clothing is uploaded, you can manage its visibility and pricing from the Configure Item menu.
Setting a Price for Sale
- Go to Create > My Creations
- Hover over your clothing item and click the gear icon
- Select “Configure”
- Under Sales, check “Item for Sale”
- Enter the Robux price and save changes
Roblox takes a 30% marketplace fee, so if you sell a shirt for 100 Robux, you earn 70.
Making Items Private or Group-Only
You can choose whether:
- Anyone can buy your item
- Only group members can access it
- The item remains private (useful for testing)
This is especially useful if you’re building an exclusive clothing line tied to a brand or gaming group.
Check also: Top 10 Scary Roblox Games to Play With Friends (Multiplayer Horror)
Roblox Moderation Guidelines
Roblox reviews all uploads for violations. To avoid delays or takedowns, follow these key rules:
- No copyrighted logos
- Avoid offensive language or symbols
- No deceptive branding or fake giveaways
- Be cautious with political or religious themes
If your design is rejected, review the moderation reason in your Developer Console and re-upload after corrections.
Common Upload Issues and Fixes
| Problem | Likely Cause | Solution |
| File fails to upload | Wrong resolution or file type | Use PNG format at 585×559 pixels |
| Item doesn’t appear in group store | Uploaded under personal account | Re-upload and select group instead |
| Long approval time | Under review by moderation | Be patient, avoid re-upload spamming |
| Connection timeout | Network lag or browser issue | Use ExitLag for smoother uploads |
Selling Your Designs and Growing Your Clothing Brand
Once your item is live and visible in the Roblox catalog or your group store, the next step is promotion. Creating great designs is just the start — you’ll also need to focus on how to sell, market, and improve your visibility to generate Robux.
How to Sell Roblox Clothing Effectively
To boost sales:
- Use clear and catchy names for your items
- Write descriptions that highlight unique features (e.g., “Limited-edition fire hoodie with glow effect”)
- Promote your creations on:
- Roblox clothing groups
- YouTube tutorials
- TikTok and Instagram Reels
- Discord servers with Roblox channels
Visuals matter. Always display your clothing on a well-lit avatar preview and avoid cluttered thumbnails.
Launch a Themed Collection
Instead of uploading random pieces, try creating themed sets such as:
- Holiday outfits (e.g., Halloween, Christmas)
- Color-based collections (e.g., pastel streetwear)
- Game-inspired fashion (e.g., futuristic or medieval)
This improves branding and gives players a reason to revisit your store.
Check also: How to Create a Custom Avatar in Roblox Studio
Advanced Tips for Creating Popular Roblox Clothing
If you want to stand out from thousands of creators, consider these design and marketing tips:
1. Follow Trends
Browse the avatar shop weekly to see which styles are trending. Keywords like “core,” “grunge,” “aesthetic,” or “slay” are commonly searched by Roblox players.
2. Use Layered Clothing to Your Advantage
Roblox now supports layered clothing, allowing you to design hoodies, coats, and more realistic apparel. Experiment with shading and 3D overlays to give your clothes more depth.
3. Collaborate With Creators
Reach out to influencers or streamers who might showcase your items in gameplay or outfit builds.
FAQ: How to Make Roblox Clothing
To make clothing in Roblox:
Download the official shirt or pants template
Use an image editor like GIMP or Photopea
Design within the template dimensions (585×559 px)
Upload the PNG file via the Create tab on Roblox
Ensure you have Roblox Premium to sell the item
Use the official Roblox shirt template for shirts and pants. T-shirts don’t require a template and only display a graphic on the avatar’s torso.
Yes. Designing clothes is free using tools like Photopea or GIMP. However, to upload and sell clothing, you’ll need a Premium membership and 100 Robux to create a group (if selling through a store).
Shirts and pants are uploaded via the web portal, not directly through Roblox Studio. Go to roblox.com/develop, choose the clothing type, and follow the upload steps.
T-shirt: Basic image on the torso, no sleeves or design depth
Shirt: Wraps around full upper body with layered textures and sleeves
Pants: Designed for lower body and legs
Conclusion: Express Your Creativity and Build a Brand in Roblox
Learning how to make Roblox clothing is one of the most fun and creative skills any player can develop. Whether you’re designing just for fun or building a clothing empire, the tools and opportunities are all available — all you need is a little imagination and consistency.
Now that you know everything about how to make Roblox clothing, and if you want a smoother experience while uploading, testing, or showcasing your designs online, ExitLag can help eliminate lag spikes and optimize your connection in real time. Start creating. Start selling. Start building your fashion legacy in Roblox today.
Got questions or want to connect with other players? Join the conversation at the ExitLag Forum!