Minecraft skins are one of the most powerful forms of player expression in the game. Whether you’re creating a simple redesign, a highly detailed character, or a full thematic skin pack, mastering a Minecraft skin editor allows you to bring your identity to life in Minecraft. In this guide, you’ll learn how skin editors work, the best tools available, how to design high‑quality skins, and how to export them for Java and Bedrock Edition.
What Is a Minecraft Skin Editor?
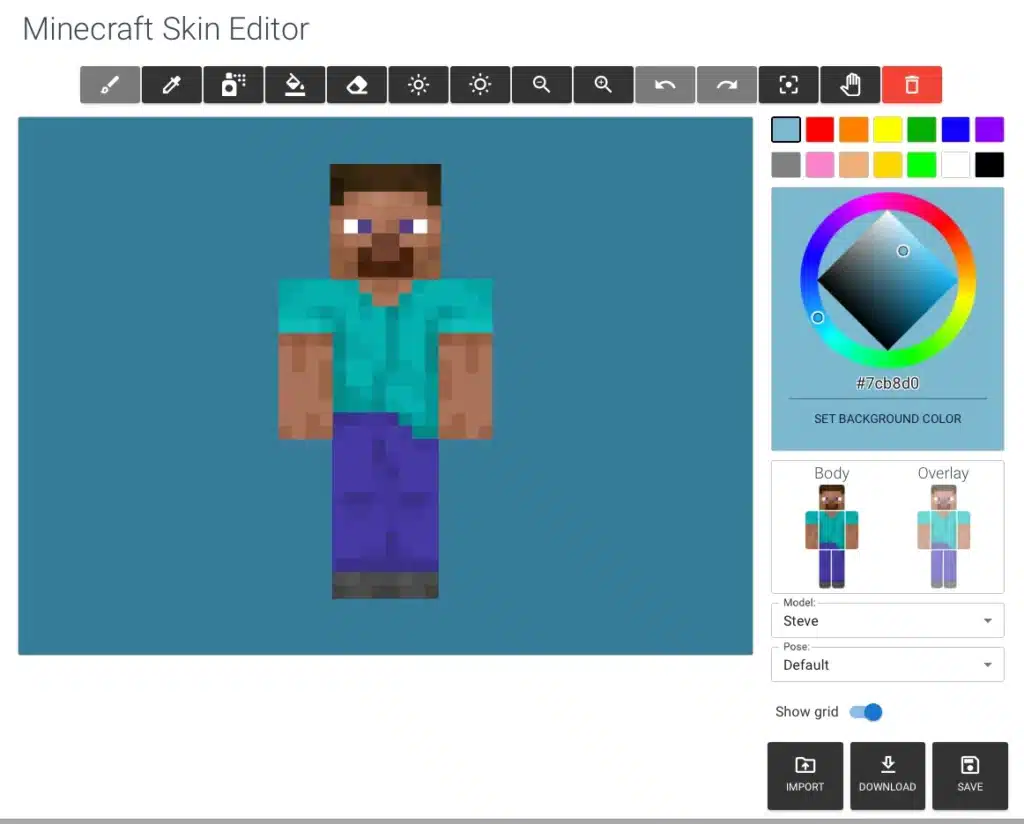
A Minecraft skin editor is a tool-online or offline-that allows players to design custom character skins. These editors provide 2D pixel editing, 3D model previewing, layering options, and direct export features for Minecraft.
Common Features of Skin Editors
- Full 3D model rotation
- Color palette and shading tools
- Mirror mode for symmetrical designs
- Layer toggles (inner/outer layers)
- Direct download for Java and Bedrock skins
- Import existing skins for editing
Types of Minecraft Skin Editors
Not all editors are the same. Some focus on simplicity, while others provide advanced tools for creators who want professional‑quality skins.
Online Editors
These are browser‑based and require no installation.
- Ideal for beginners
- Fast access and simple tools
- Built‑in community skin galleries
Offline Editors
Downloaded programs with more control.
- Advanced shading tools
- Offline work support
- Better performance with large skin projects
Most Popular Minecraft Skin Editors
Below are the most widely used and trusted editors in the Minecraft community.
1. Skindex Editor (skin maker for Minecraft)
A popular online tool with thousands of user‑generated skins.
Features:
- Easy drag‑and‑paint interface
- Real‑time 3D preview
- Upload directly to your Minecraft profile
- Large skin gallery
2. NovaSkin (Minecraft skin editor online)
A more advanced browser‑based editor with extended customization options.
Features:
- Layer blending modes
- Custom backgrounds
- Built‑in pose creator
- Skin history and undo tools
3. Planet Minecraft Skin Editor
Perfect for players who want community sharing and detailed tools.
Features:
- Precise pixel grid controls
- Advanced shading tools
- Integration with PlanetMinecraft uploads
4. MCSkin3D (advanced skin maker for Minecraft PC)
A downloadable Windows program with professional features.
Features:
- Layer opacity settings
- Full 3D animation preview
- High‑precision shading
How to Make a Minecraft Skin (Step-by-Step)
Creating a skin from scratch is easier than it looks-especially with the right technique.
Step 1: Choose Your Editor
Select an editor based on your level:
- Beginner: Skindex, Minecraftskins.com
- Intermediate: NovaSkin
- Advanced: MCSkin3D
Step 2: Start With a Base Template
Choose:
- Steve model (4‑pixel arms)
- Alex model (3‑pixel arms)
Step 3: Outline the Character
Begin by sketching:
- Hair/helmet shape
- Torso pattern
- Pants/boots
- Gloves or sleeves
Step 4: Add Base Colors
Fill large regions with flat colors before adding detail.
Step 5: Apply Shading and Highlights
This is what makes a skin look professional.
Shading Tips:
- Use 2–3 tones of each color
- Darker tones under arms, legs, and edges
- Highlights on top‑facing surfaces
Step 6: Add Details
Great skins include:
- Accessories (belts, goggles, straps)
- Textures (fabric patterns, gradients)
- Secondary colors for contrast
Step 7: Export and Save
Download your skin in PNG format.
For Java Edition:
- Upload at minecraft.net → Profile → Change Skin
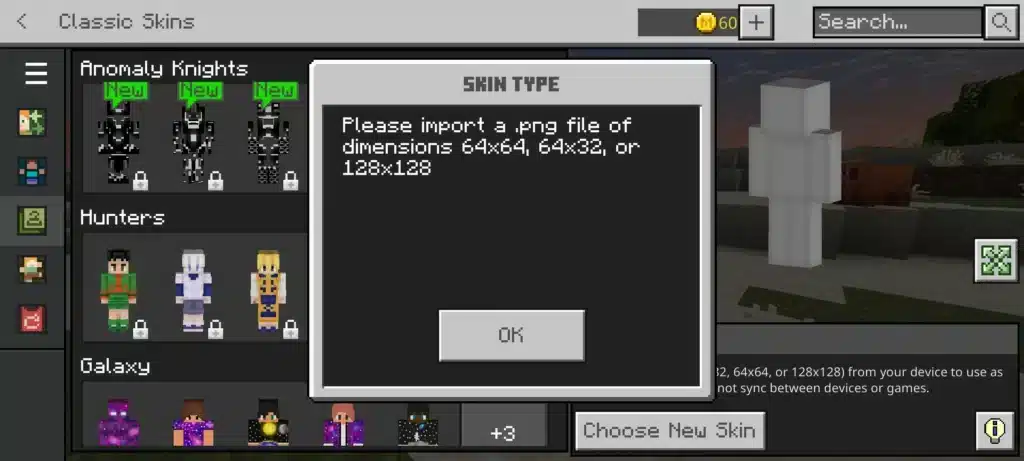
For Bedrock Edition:
- Import directly in‐game from the profile creator.
What Makes a Good Minecraft Skin?
Key Elements of Quality
- Clean shading
- Consistent color palette
- Clear silhouette
- Balanced contrast
- Unique theme
Avoid:
- Random noise shading
- Overuse of pure black or pure white
- Busy patterns with no structure
- Unreadable shapes
Using Minecraft Skin Editors for Roleplay, Servers, and Content Creation
Different playstyles benefit from tailored skins:
For Roleplay
- Medieval outfits
- Knight armor
- Fantasy characters
For PvP
- Dark colors reduce visibility
- Minimalistic designs
For YouTube / Streaming
- High‑contrast colors
- Distinctive features
- Recognizable branding
Advanced Techniques for Professional Minecraft Skin Design
Creating a truly standout Minecraft skin requires understanding artistic principles used by pixel artists. The following techniques elevate your skins from simple designs to polished, high‑quality creations.
Mastering Pixel Art Fundamentals
Minecraft skins use a 64×64 pixel canvas, so every pixel matters.
Key Principles:
- Cluster theory: Group pixels into meaningful shapes rather than scattering random dots.
- Selective outlining: Use darker tones to subtly outline major shapes without harsh black borders.
- Hue shifting: Instead of darkening colors with gray or black, shift hue toward cooler or warmer tones for realistic shading.
Color Theory for Skin Design
A well‑chosen palette enhances visual clarity.
Tips:
- Use complementary colors for contrast.
- Apply analogous colors for smooth gradients.
- Keep saturation moderate to avoid visual noise.
Using Outer Layers for 3D Effects
Modern Minecraft skins support two layers per body part, enabling advanced depth effects.
Best Outer Layer Uses
- Hoodies and jackets
- Scarves and capes
- Knee pads and armor plating
- Hair volume and ponytails
- Goggles, glasses, and masks
Avoid Overuse
Too much extrusion makes skins look bulky and unreadable at a distance. Always balance clarity with style.
Designing Themed Skins
Themes help guide creative choices and ensure consistency.
Popular Themes:
- Cyberpunk: Neon accents, glowing visors, metallic limbs.
- Fantasy: Robes, enchanted armor, runic symbols.
- Sci‑Fi Soldier: Tactical armor, insignias, tech panels.
- Horror: Split faces, stitched textures, glowing eyes.
- Cartoon/Chibi: Bright colors, simplified shapes, oversized features.
How to Maintain Theme Consistency
- Reuse key colors across the whole body.
- Apply the same shading style everywhere.
- Keep accessories aligned with theme (e.g., belts for medieval, wires for sci‑fi).
Creating a Minecraft Skin for Java Edition vs. Bedrock Edition
The two versions support similar formats but differ in ease of customization.
Java Edition
- Direct PNG uploads
- Supports transparent pixels
- No automatic model scaling
Bedrock Edition
- Includes a built‑in character creator
- Some skins require the “slim” format
- Marketplace skins may use geometry overrides
Exporting Tips
- Use naming conventions like username_skin_v1.png
- Always preview on a 3D viewer before uploading
Mobile Skin Editors (Android & iOS)
Players on mobile devices have powerful editors available.
Best Mobile Apps:
- Skinseed: Extremely popular with easy export to Bedrock.
- Skins Editor 3D: Full 3D manipulation and layering.
- Skin Creator for Minecraft: Simple but effective for beginners.
Pros and Cons of Mobile Editing
Pros:
- Portable
- Touch controls feel intuitive
Cons:
- Harder to paint precise details
- Smaller screen makes shading more difficult
How to Make a Good Minecraft Skin (Advanced Techniques)
Take your designs further with these professional approaches.
1. Material Shading
Different materials reflect light differently.
- Fabric: Soft gradients
- Leather: Higher contrast and sharper highlights
- Metal: Strong reflections, use bright highlights
- Hair: Directional shading and layered streaks
2. Anatomy Simulation
Even though characters are blocky, simulating real anatomy improves form.
Examples:
- Darken areas under the arms
- Highlight shoulders and kneecaps
- Add subtle gradients around the chest and back
3. Texture Patterns
Add patterns that enhance realism:
- Wool textures
- Chainmail dots
- Plaid or stripes
- Gradient fade effects
How to Make Your Minecraft Skin Stand Out
Techniques for Uniqueness
- Add an asymmetrical accessory (half‑cape, shoulder strap).
- Incorporate a signature color used across your builds or channel.
- Add lore-details that suggest a backstory.
- Create thematic variations for seasons or events.
Common Mistakes When Making Skins
Avoid these errors to ensure clarity and quality:
- Over‑shading, creating a “muddy” look.
- Too many accessories on outer layers.
- Using neon colors excessively.
- Making the face too dark or indistinct.
Using Minecraft Skins in Multiplayer
Your skin affects first impressions on servers.
Choosing the Right Skin Type
- Minigames: Bright and fun skins.
- Survival SMP: Simple, recognizable designs.
- PvP: Low‑visibility skins for tactical advantage.
- Roleplay: Themed and lore‑consistent outfits.
Server Etiquette
- Avoid controversial or inappropriate skins.
- Match themed worlds with appropriate designs.
- Coordinate skins with friends or factions.
Advanced Shading Techniques for High‑End Skins
Shading is the foundation of professional skin design. With advanced techniques, you can create skins that look textured, dimensional, and visually striking.
Gradient‑Based Shading
Instead of harsh transitions, use smoother gradients across:
- Sleeves
- Legs
- Torso panels
- Hair sections
This creates realism and makes the skin appear soft and cohesive.
Directional Lighting
Choose a consistent imaginary light source.
Most artists use top‑left lighting, which:
- Places highlights on top surfaces
- Places shadows under arms, chin, and lower legs
- Keeps consistency across the entire model
Ambient Occlusion (AO)
Add soft shadows where body parts intersect.
Examples:
- Under the head
- Inside arm joints
- Around the waistline
AO adds depth without complex detail.
Designing Skins for Specific Character Archetypes
Different character types require different shading, texturing, and color choices.
Warrior / Knight Skins
- Heavy armor with metallic highlights
- Strong silhouette around shoulders and boots
- Layered plating using outer‑layer effects
Mage / Wizard Skins
- Gradient robes
- Runes or symbols on chest and sleeves
- Flowing cloaks using layered fabric effects
Modern / Casual Skins
- Hoodies and jackets
- Sneakers with clean shading
- Natural hair shading with soft highlight strips
Creature / Monster Skins
- Asymmetrical textures
- Claws, scales, or glowing eyes
- Uneven shading for organic feel
Creating Skins for Content Creators and Branding
Many YouTubers, streamers, and SMP players use unique skins to build identity.
Key Elements of a Creator Skin
- Visually distinct silhouette
- Recognizable color palette or logo
- Clean face design readable from far away
Branding Tips
- Use one signature color across all outfits
- Add mascot‑style elements (ears, goggles, scarf)
- Create multiple outfits for different series or seasons
Skin Packs and Themed Collections
Skin editors can create entire sets of matching skins.
Skin Pack Ideas
- Seasonal packs (winter, Halloween, summer)
- RPG classes (warrior, mage, rogue, healer)
- Faction packs for SMP groups
- Sci‑fi crew sets (pilot, engineer, captain)
Designing Consistent Packs
- Keep palette identical across skins
- Share accessories or motifs
- Use similar shading methods and styles
Importing and Editing Existing Skins
Many players start by modifying a skin they already like.
Safe Import Workflow
- Download the PNG of the target skin.
- Import into your editor.
- Edit layer by layer.
- Replace only the parts needed.
Ethical Skin Editing
- Give credit when modifying community skins.
- Avoid claiming others’ work as your own.
- Use inspiration, not duplication.
Creating HD Skin Concepts (for Mods and Custom Launchers)
While vanilla Minecraft uses 64×64 skins, some modded environments allow HD skins.
HD Skin Benefits
- Smoother gradients
- More detailed facial features
- Complex armor textures
- Better shading control
HD Skin Limitations
- Only works in compatible modpacks or launchers
- Not visible to vanilla players
Using a Minecraft Skin Editor for 3D Modeling Practice
Skin editing helps train:
- Pixel art skills
- Color theory understanding
- Visual hierarchy
- Model‑based design thinking
These skills translate to:
- Texture pack creation
- Modding
- 3D modeling
- Game art fundamentals
Troubleshooting Common Skin Issues
Even experienced creators encounter challenges.
Colors Look Different In‑Game
Cause: Lighting differences.
Solution: Test skins in multiple biomes.
Skin Looks Flat
Cause: No shading variation.
Solution: Add gradients and AO shadows.
Face Looks Strange
Cause: Over‑detailed or under‑shaded features.
Solution: Simplify and balance colors.
Outer Layer Clipping
Cause: Misplaced pixels.
Solution: Turn on 3D model preview and adjust overlapping areas.
How to Export Skins Correctly
Proper exporting ensures compatibility and appearance.
Export for Java Edition
- Save as PNG
- 64×64 resolution
- Upload through the official Minecraft site
Export for Bedrock Edition
- Import in the in‑game character creator
- Select slim or classic model
File Naming Tips
Use predictable versions:
- username_default_v1.png
- username_winter_v2.png
Using Custom Skins in Multiplayer Servers
Your skin showcases identity and communicates role.
Optimize for PvP
- Reduced color contrast to blend with terrain
- No bright accessories
- Minimal outer layer
Optimize for SMP Roleplay
- High readability
- Themed outfits for your character arc
Optimize for Minigames
- Fun, bold, expressive styles
Final Thoughts
A Minecraft skin editor gives you complete control over your character’s identity, enabling unlimited visual creativity. With advanced shading, theme consistency, 3D layering, and exporting techniques, you can create professional‑quality skins for Java, Bedrock, SMP servers, roleplay, or content creation.
Whether you’re perfecting one signature skin or building entire themed packs, mastery of skin editing allows you to stand out in any world or server. Let your creativity shape your next adventure.
General Disclaimer
All game images used in this blog belong to Mojang Studios. They are used for informational/educational purposes only and do not imply endorsement or affiliation with the rights holders.
Got questions or want to connect with other players? Join the conversation at the ExitLag Forum!