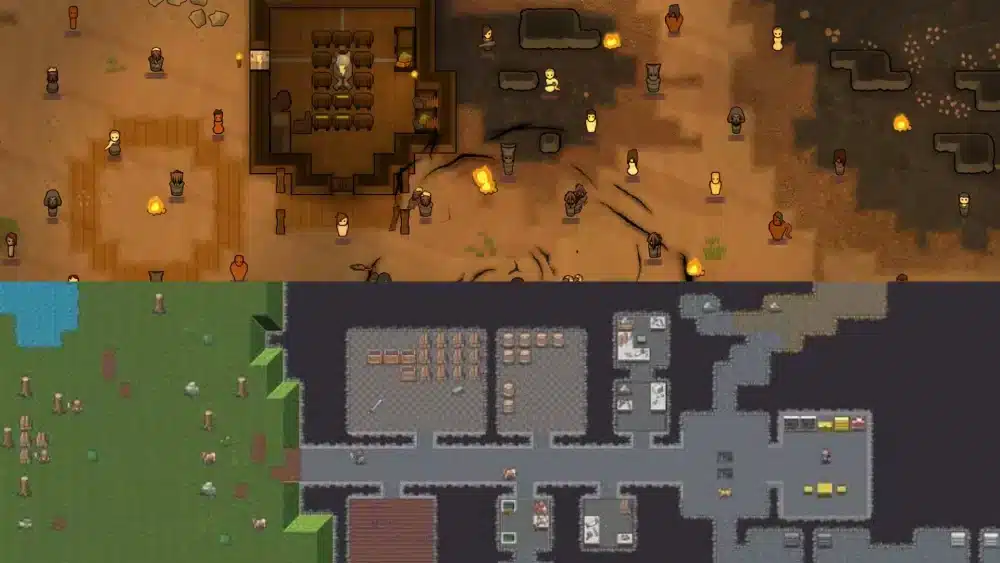
If you want to strengthen your base and survive increasingly difficult raids, building a RimWorld Killbox is one of the most reliable strategies in the game. A well-designed killbox can shape how enemies approach your colony, slow them down, and maximize the damage they take. This guide shows how to build Killboxes effectively in RimWorld 1.5 while avoiding outdated or misleading advice.
A strong RimWorld Killbox can still perform extremely well in the current version, especially when you understand enemy behavior, trap avoidance, and how raid types interact with your layout. However, they are no longer “guaranteed success tools” by default. Their effectiveness depends on design quality, terrain, blocked alternative paths, and the type of raid you’re up against (sappers, breachers, mechs, tribals, etc.).
So, let’s start with the basics.
What is a Killbox in RimWorld?
In simple terms, it’s a controlled entrance built to funnel raiders through a narrow, predictable route where your colonists and automated defenses can eliminate them with minimal risk.
RimWorld Killbox – What Is a Killbox?
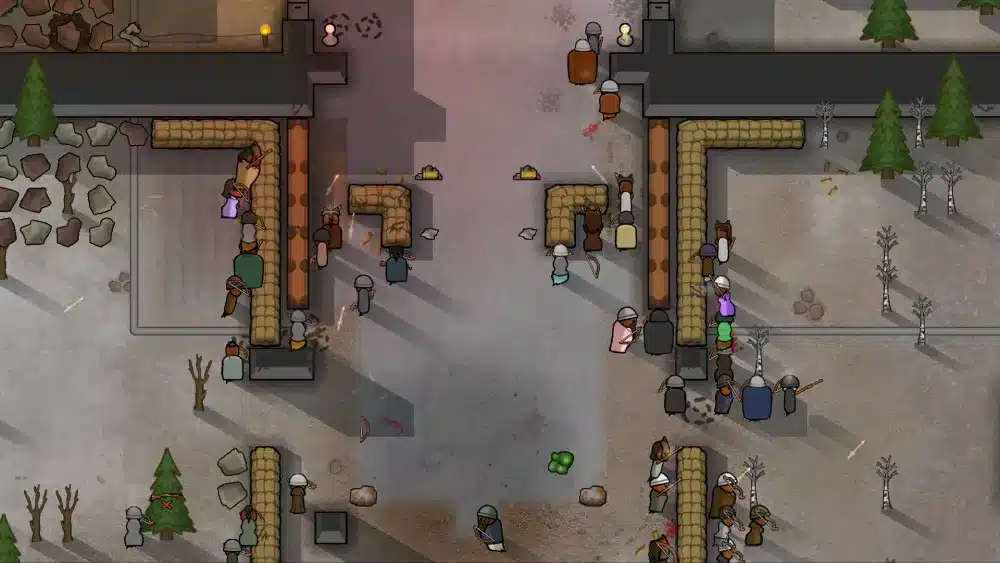
A RimWorld Killbox is a defensive structure that manipulates raid AI into walking through a corridor optimized for maximum damage output. Instead of spreading across your base, enemies are forced into a planned kill zone with traps, turrets, obstacles, and firing positions.
How Killboxes Manipulate Pathfinding
RimWorld AI generally follows the shortest accessible route. If you remove alternative paths and make your killbox the “only viable entrance,” raiders naturally walk into it—unless they are sappers, breachers, or mech clusters with special behavior.
How Killboxes Perform in RimWorld 1.5
Killboxes still work well in RimWorld 1.5, but with caveats:
- Enemies avoid long or overly trapped corridors;
- Sappers may dig through mountains instead of entering;
- Some mechs resist certain trap types.
So instead of “guaranteed consistent success,” the accurate statement is:
Killboxes remain highly effective in RimWorld 1.5 when well-designed, but require attention to AI improvements and potential alternative pathways.
Pros and Cons of Using a Killbox in RimWorld
Understanding benefits and limitations helps avoid over-reliance on a single defensive structure.
Pros of Killboxes in RimWorld
- Predictable enemy routes;
- Lower colonist exposure;
- Easy to upgrade and expand;
- Efficient against early- and mid-game raids;
- Strong synergy with turrets and explosives;
- Works on most biomes and map seeds.
Cons of Killboxes in RimWorld
- Sappers can dig around it;
- Mechanoids with long-range weapons can hit your colonists;
- Corridor too long → raiders may choose alternative routes;
- Trap overuse triggers trap-avoidance AI;
- Over-reliance can collapse your whole strategy if enemies break through.
Step-by-Step RimWorld Killbox Design for Version 1.5
Below is a practical guide to build effective RimWorld Killbox designs that match current AI behavior.
Step 1 — Pick the Right Location
Place the killbox in front of your main entrance where terrain naturally blocks unwanted routes. Seal cliffs and thin rock walls so sappers aren’t tempted to bypass your funnel.
Step 2 — Build a Balanced Corridor Length
A common misconception is that “longer is better.”
But if the corridor is too long, AI may calculate that breaking walls elsewhere is faster. Aim for medium length (10–20 tiles).
Step 3 — Create Your Firing Chamber
Add:
- Sandbags/barricades for colonists;
- Firefoam poppers;
- Doors for emergency retreat;
- Reinforced walls;
- Shielded melee blockers for choke points.
Step 4 — Control Raider Speed
Use tile manipulation to slow enemies:
- Rubble;
- Sand;
- Water patches;
- Spike traps spaced out strategically.
And fast tiles for colonists (metal tile, carpet).
Weapon & Trap Placement for the Best Killbox Designs
A killbox lives or dies by weapon synergy and trap economy. Over-trapping is now counterproductive because enemies may avoid the killbox entirely.
Best Weapons for Colonists (by Range)
Close Range (<10 tiles)
- Chain shotgun;
- Chaingun / Minigun (devastating in tight funnels);
- Heavy SMGs.
Medium Range (10–30 tiles)
- Assault rifles;
- Charge rifles (strongest mid-late game DPS).
Long Range (>30 tiles)
- Sniper rifles;
- Turrets with long range such as mini-turrets or modded equivalents.
Trap Placement — What Works and What Fails
The RimWorld wiki warns: trap corridors with back-to-back traps encourage avoidance AI.
Correct trap spacing:
- Spike trap;
- Empty tile;
- Spike trap;
- Empty tile;
- IED every 8–12 tiles.
This reduces avoidance behavior while still dealing massive damage.
Common Killbox Mistakes (and How to Fix Them)
Mistake 1 — Trap Overuse
Too many traps in a row = enemies path around it. Mix traps strategically.
Mistake 2 — Weak Perimeter
Unblocked back entrances, thin mountain walls, or open terrain may allow sappers to choose alternative infiltration points.
Mistake 3 — Neglecting Corridor Length
If the killbox is too long or complex, raiders may dig through rock, destroy walls, or split forces.
Mistake 4 — Ignoring Weather/Temperature
Snow or mud slows colonists more than enemies unless tiles are replaced.
“Singularity Killbox” — Community Name, Not Official Term
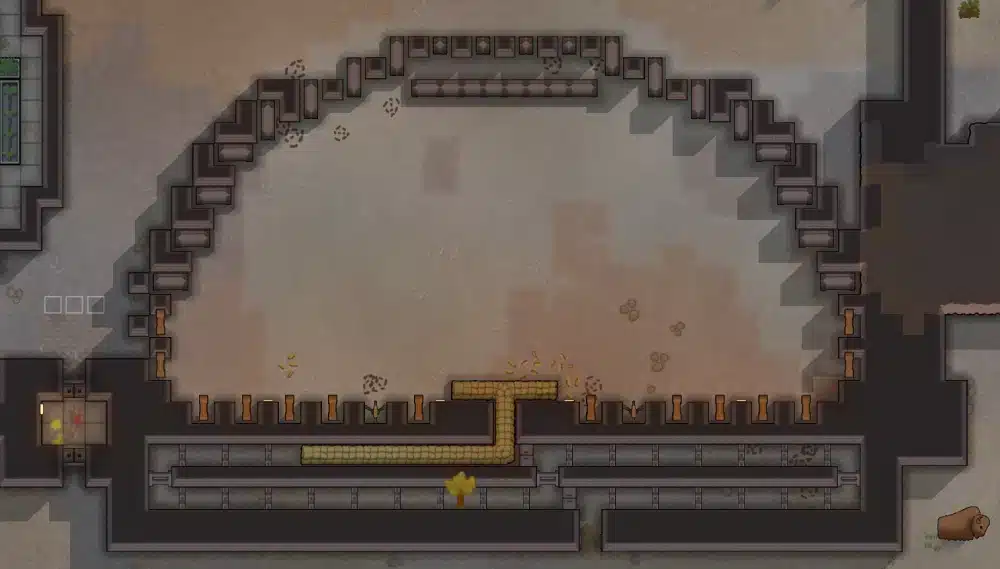
The so-called “RimWorld Singularity Killbox” is a community nickname, not an official layout. It refers to a rotating, circular corridor that forces enemies to walk in loops before reaching your fire zone.
When This Layout Works
- You have space to build;
- You’re facing large mech raids;
- You can maintain turret fire from multiple angles.
When to Avoid It
- Your base is inside a mountain;
- You lack resources;
- You can’t block alternative paths effectively.
Comparison Table: Killbox Types and Their Uses
Before diving into advanced layouts, here’s a quick comparison of the most common RimWorld Killbox types. Each design shines in different situations, so this table helps you choose the one that best fits your colony’s needs.
| Killbox Type | Difficulty | Best Use Case | Strength | Weakness |
| Standard Corridor | Easy | Early game | Low cost | Weak vs sappers |
| Funnel w/ Turrets | Medium | Mid game raids | High DPS | Vulnerable to explosives |
| “Singularity” Loop | Hard | Large late game waves | Multi-angle fire | Space heavy |
| Trap-Moderate Corridor | Medium | Tribal raids | Low upkeep | Trap avoidance risk |
| Hybrid Killbox | Hard | Mixed threats | Flexible | Requires micromanagement |
Additional RimWorld Killbox Designs for Inspiration
Dual-Funnel Killbox
Two entry lanes confuse enemies and split crowds, reducing burst damage risk.
Heat Killbox
Uses high temperatures to weaken enemies before the firing chamber. Excellent against human raiders, weaker vs mechs.
Core Principles Behind Every Effective RimWorld Killbox Design
When you look at the most effective RimWorld Killbox designs shared by experienced players, they all follow a set of core principles. These fundamentals don’t just make your killbox stronger, they determine whether raiders will even enter it in the first place.
Below is a more dynamic breakdown of the key elements that make Killboxes RimWorld players rely on truly reliable.
1. Control the Enemy’s Entry Route
A successful killbox starts by shaping how raiders approach your base. You must close alternate pathways, reinforce weak walls, and funnel attackers into a predictable direction. If enemies see a faster or safer route, especially in RimWorld Killbox 1.5, they may dig through rock or breach thinner walls.
2. Block Every Alternative Path
Any open flank—like an unsealed mountain edge or thin perimeter—invites sappers to bypass your defenses. Always inspect your map for rock tiles, abandoned cave entrances, or open coast paths that enemies might exploit. This is critical for consistent Rimworld Killboxes performance.
3. Mix Traps Instead of Creating Trap-Only Corridors
Trap corridors used to dominate older versions, but in 1.5, they encourage trap-avoidance AI. The best Rimworld Killbox designs use alternating spacing, mixing spike traps with empty tiles and the occasional IED. This keeps raid behavior predictable while still dealing heavy damage.
4. Reinforce Your Roof and Outer Walls
Mortars, explosions and mechanoid cannons easily collapse roofs over your firing chamber. Add pillars, replace wood with stone, and create double-thick walls. A killbox is only as strong as its structural stability.
5. Use Firefoam Poppers for Explosion Control
Turrets chain-react when they explode. Firefoam poppers prevent catastrophic meltdowns, especially in turret-heavy Killbox design Rimworld strategies where combustion can wipe your whole defense line.
6. Match Your Colonists’ Weapons to the Killbox Layout
Different weapons shine at specific ranges:
- Close-range (<10 tiles): chain shotguns, miniguns;
- Mid-range: assault rifles, charge rifles;
- Long range: sniper rifles.
This synergy makes a huge difference in any Rimworld Killbox design 1.5.
7. Redundant Power and Backup Turrets
Turrets consume power and are easily disabled by EMP grenades or Zzztt events. Use separate power grids and backup batteries to keep your Killboxes Rimworld functional even under pressure.
8. Avoid Overly Long Corridors
A corridor longer than ~20 tiles can trigger avoidance behavior. Raiders may decide it’s “not worth it” and dig into your base instead. Keep the funnel medium-length for optimal AI engagement.
9. Adapt to Terrain Weaknesses
Snow, mud and bridges modify movement speed differently. Check for nearby mountains, caves, marshlands or shortcuts. A good Killbox Rimworld setup respects terrain instead of fighting it.
10. Add Fallback Doors and Emergency Exits
If your line collapses, you must retreat safely. Install side doors and protected hallways so colonists never get cornered. It’s the final layer of safety that keeps a RimWorld Killbox effective even under unexpected pressure.
FAQ
A medium corridor with sandbags, spaced traps and a simple firing chamber.
Yes, when well-designed and when alternative routes are blocked.
Double-wall perimeters, blocked rock tiles, and turret bait structures.
Use traps moderately to avoid trap-avoidance AI.
It’s a strong community build, but requires large space and resources.
Build Smart, Survive Longer (And Improve Your Online Games!)
A well-built RimWorld Killbox can dramatically increase your survival odds, especially on tougher storytellers like Randy Random and Cassandra. By understanding how AI behaves in RimWorld 1.5, placing traps correctly, preventing alternative paths, and matching weapons to corridor length, your defenses become far more reliable.
And if you also want smoother, more stable performance while playing online games on PC or mobile, ExitLag helps reduce lag, lower ping, and stabilize routes using multi-path optimization. Important: ExitLag is compatible only with PC and mobile, not consoles.
With better defenses in RimWorld, and better connection stability in real games, survival becomes a lot easier.
Got questions or want to connect with other players? Join the conversation at the ExitLag Forum!